Image Credit: All photos: Brian Post and Kyra Salancy
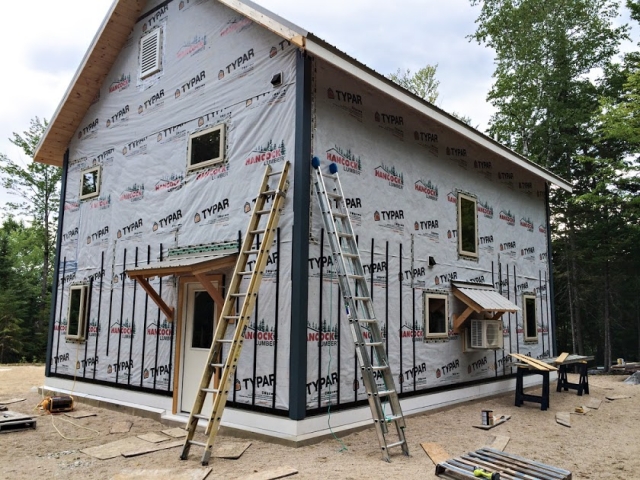
Image Credit: All photos: Brian Post and Kyra Salancy A photo of the house before the siding was installed. One of our home's bathrooms.
Editor’s note: This is the fourth in a series of blogs chronicling the design and construction of a house owned by Brian Post and Kyra Salancy. The first blog in the series was titled Building a Small House in the White Mountains.
The winter of 2013-2014 started without much snow, but progressed into an extended period of cold and snow from February through March. Normally, we’d take advantage of this on skis, but the house project was occupying most of our attention.
Drywall, window trim, and interior doors
The drywall crew completed hanging, taping, and mudding the drywall in early February 2014. We went with rounded corners and the crew did a great job.
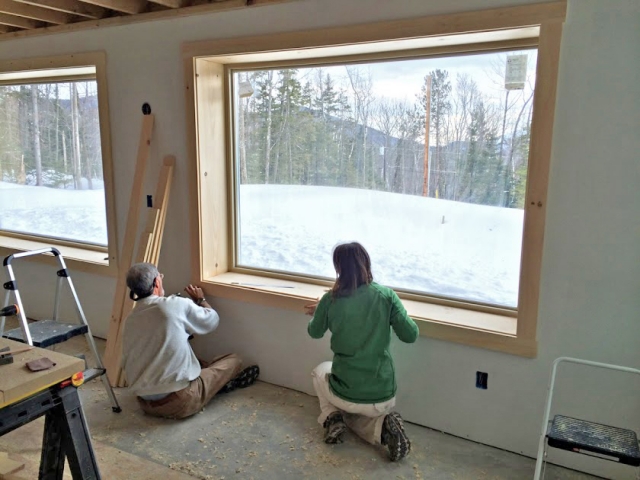
After this was done, I sealed up the rough window openings with canned spray foam and we started working on window trim. Kyra’s dad came for the first of many visits at this time, helping on various projects with his woodworking skills.
We liked the look of simple pine trim and went with 12-inch pine boards for the jambs and 4-inch pine boards for the casing. The window trim work required a lot of shimming and other fitting work, but it came out well.
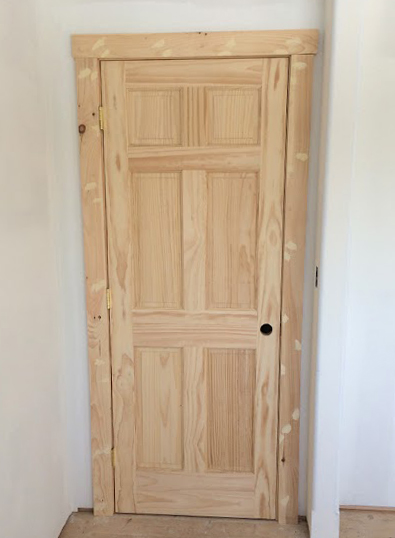
We were also focusing on the upstairs: painting, installing pine trim, and hanging interior doors. We were trying to keep costs down, but did get affordable solid pine wood doors. With finishing products, we went with no/low VOC and more natural products whenever we could. This included using Vermont Natural Coatings PolyWhey finish on all the pine trim.
Exhaust-only ventilation
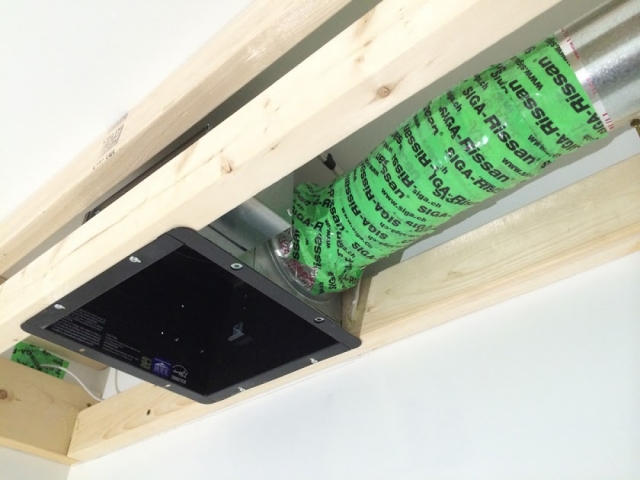
Based on the recommendation of our foundation/shell contractor, we went with an exhaust ventilation setup consisting of Panasonic WhisperGreen bath fans with Panasonic passive air inlets. We eventually settled on a WhisperGreen model that could run on continuous levels as low as 30 cfm and then be boosted (for set time periods or until turned “off”) up to 80 cfm.
One fan was installed in the full bath upstairs and one in the half bath downstairs. Before insulation and drywall, we installed 4-inch rigid duct through the walls in the fan locations and the needed plastic duct for two passive air inlets (one downstairs and one in the main bedroom). The Panasonic passive air inlets are rated for 12 to 18 cfm, so we figured it would be OK to start with two, giving us up to 36 cfm of makeup air.
Later, when we first powered on the fans with our electrician, we figured out that the two passive air inlets were not providing enough makeup air. The house was getting depressurized even with one fan running at only 30 cfm. This was happening because the house is so tight and the passive air inlets don’t allow as much air as advertised. (One online review said they tested at 10 cfm). For various reasons, adjusting our ventilation setup would be an ongoing theme as time went on; more on this later.
Cabinets and interior stairs
We made good (but slow) interior progress over the winter and into spring 2014. The snow bank on the north side of the house finally melted in early May 2014; we continued with interior work and turned some attention to outside.
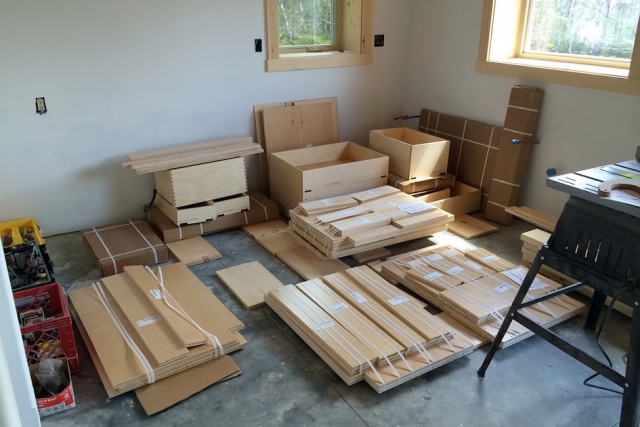
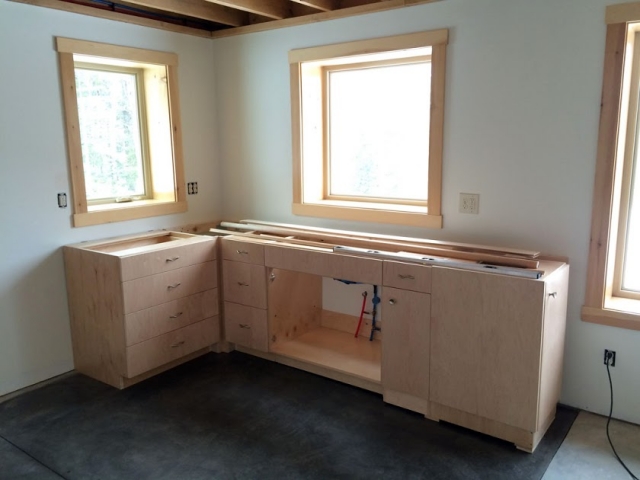
We had ordered ready-to-assemble cabinets from Barker Cabinets and kept everything stacked in the kitchen. We decided on Barker rather than a local cabinet company because the cabinets were higher quality for the price and the online ordering process was also straightforward.
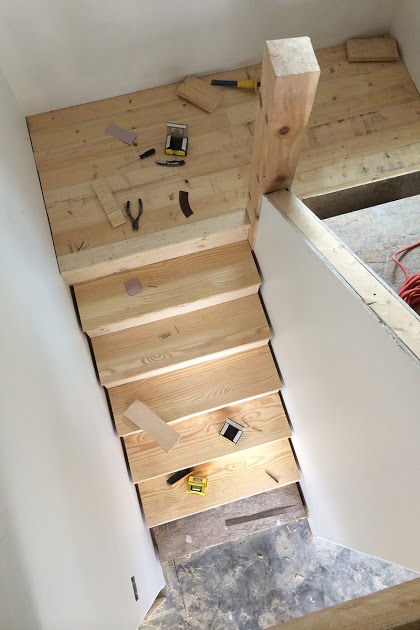
Kyra and her dad also worked on the stairs.
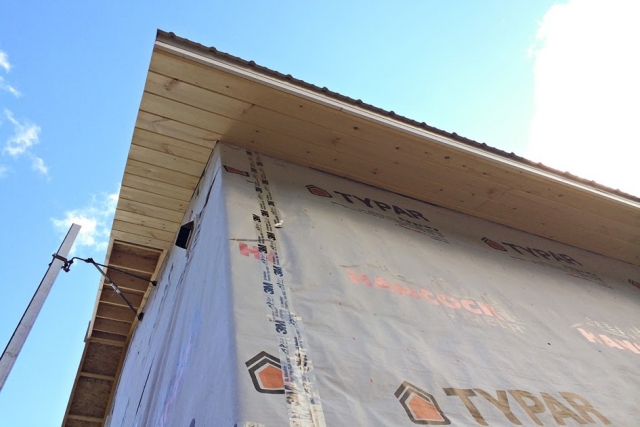
Soffits and small protective roofs
We rehired Eric, one of the workers who helped the foundation/shell contractor, to take the lead on finishing the soffit. We used 1×8 tongue-and-groove pine, treated with an exterior wood finish from Vermont Natural Coatings. It came out great, and we really liked the natural pine look.
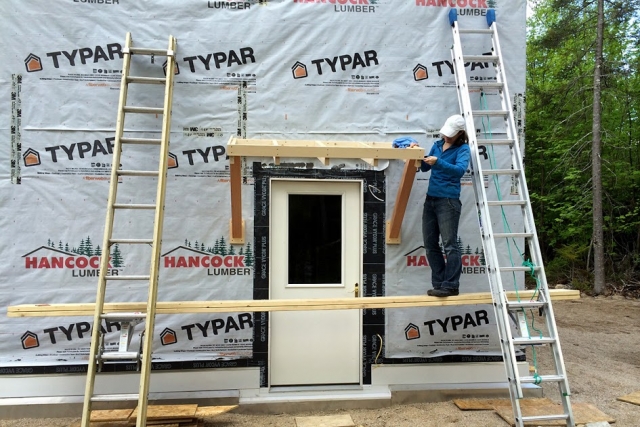
To protect the exterior doors and entrance areas, we also hired a friend, Ray, to help us build protective roofs. We used Douglas fir posts, 2x6s, tongue-and-groove pine boards, and pine trim. We also used some leftover synthetic roofing underlayment and small metal roofing panels.
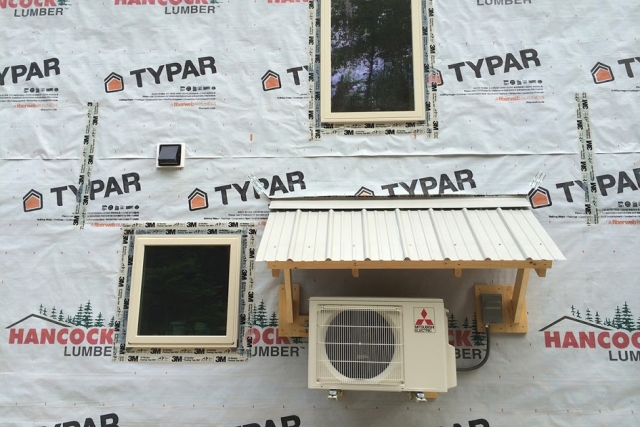
I helped Ray build the first roof and he helped us get started on the second. We took it from there and would end up using the same concept for overhangs over our large south facing windows and the exterior unit of the ductless minisplit.
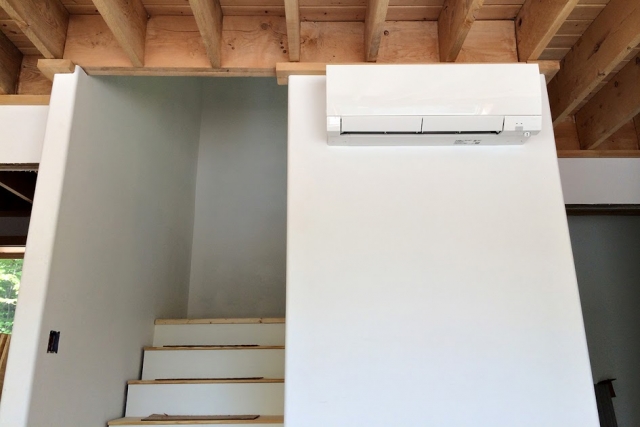
Space heat is all electric
We scheduled the installation of the ductless minisplit for early June 2014. One of these on the first floor would be our main heat source for the entire house. As backup on extremely cold nights (or if the minisplit malfunctioned) we planned to install small Stiebel Eltron wall-mounted electric heaters in each bathroom and bedroom, as well as a couple more in the open downstairs area.
We went back and forth about which size minisplit to get, but eventually decided on a Mitsubishi FH12NA. While our Energy Star HERS rater suggested we might be better going up one size, we thought the FH12NA would meet our needs. Fortunately, the installation was completed in time to take advantage of a $500 rebate from the state of New Hampshire.
Septic system and spruce floors
As spring turned into summer, the septic system was finally inspected, approved, and backfilled.
We continued on various interior and exterior projects. I ripped the Vycor Plus flashing tape off the exterior doors, spray foamed any gaps in the rough openings, used Siga Wigluv tape on the exterior part of the rough openings, patched up the housewrap, and installed some pine trim.
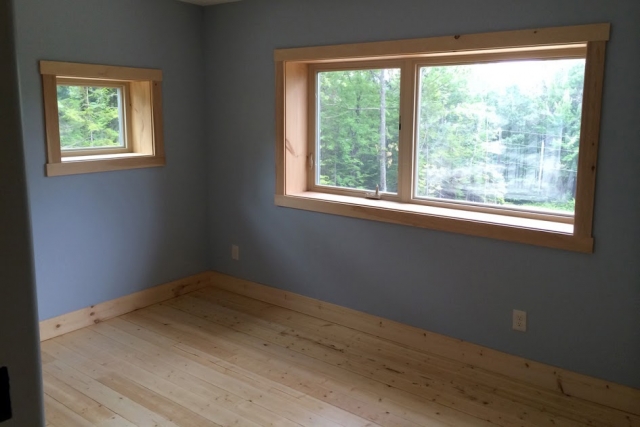
The 2×6 tongue-and-groove spruce used for the second-story floors had gotten pretty beat up during the main construction phase. We rented a commercial orbital floor sander and that (along with some hand-held orbital sander work) did a good job of cleaning up the floors. We used a product from Vermont Natural Coatings (Polywhey Floor Finish) to finish the spruce floors.
Kyra and I decided to finish the second bedroom first so it could serve as an initial finished room. We installed some pine baseboard and Kyra tackled the painting.
Quarter-sawn spruce clapboards
Starting in late July, we turned our attention to the exterior and specifically the siding. While we considered trying to tackle this ourselves, we hired Eric again. Besides his skill and experience, he also had staging and a siding nail gun. Eric took the lead on the entire siding project. I helped on and off the staging and Kyra (plus her dad) did tons of staining.
We had already ordered the siding in 2013 and stored it over the winter. The siding was quarter-sawn spruce clapboards from Ward Clapboard Mill in Vermont. Although quarter-sawn clapboards are more expensive than plain-sawn, they are more stable and less prone to cupping. We were willing to pay for this high quality, and balanced it by choosing Ward’s cottage grade, which includes blemishes and knots.
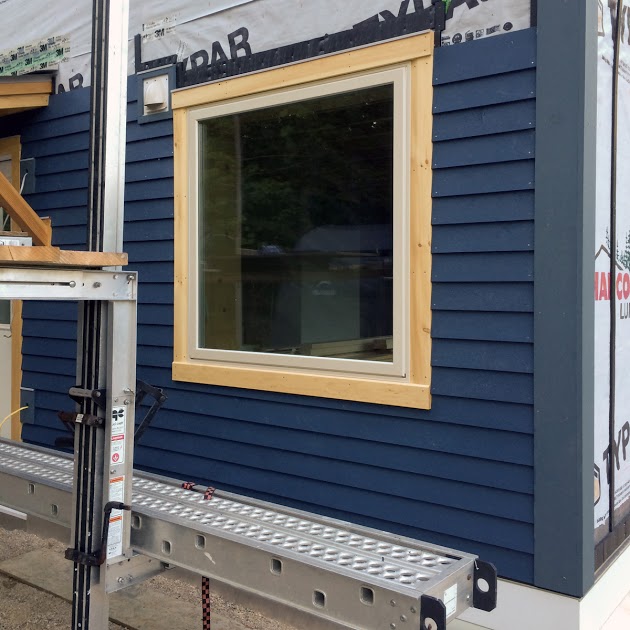
Kyra was concerned that the cottage grade might look junky, but we liked how it turned out on another house project we had been following online (“Building a super-insulated Vermont home”). We also saved enough by choosing cottage grade that we paid to have the clapboards pre-primed — a good call that meant huge time savings for us. We installed the clapboards rough side out, and it looks awesome.
The other big decision was what to do about a rainscreen.
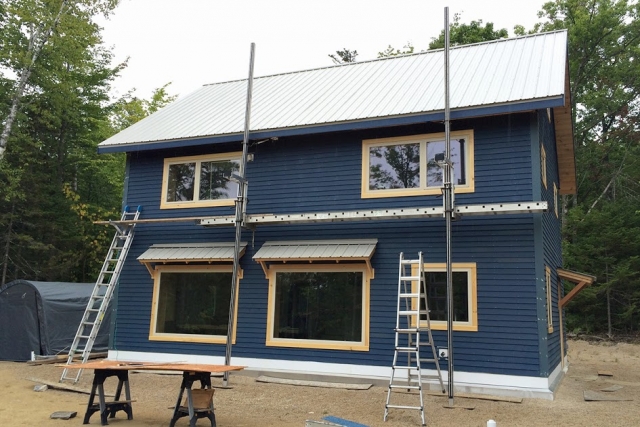
We knew this was an important feature to build into the exterior, but weren’t sure about what materials to use. We ruled out 1×4 furring strips because we thought they would push out the siding too much and complicate the window trim. Ripping plywood sheets into strips was an option, but we settled on products from Cor-A-Vent, partially because we had seen them used successfully at the Up Hill House. We used Sturdi-Strips and SV-3 Siding Vent to create a â…œ-inch rainscreen gap, vented at both the top and bottom of the wall.
Keeping the waterline from freezing
Our well contractor was scheduled to come back in September to install the submerged well pump and well tank, and to hook it all up. Before this could happen, I had to do some stressful research and decision-making about what kind of heat cable to get.
Because the water line was already hooked into the well casing and backfilled, we would have to push the heat cable into the water line from the house. The water line ran about 175 feet from the house to the well with some sweeping turns around the house and back towards the well. We made the call to get a 120-foot in-pipe heat cable that would protect the most vulnerable part of the water line starting at the house. (The 50 feet + near the well was buried deeper.)
Our well contractor suggested a certain heat cable product, but I wasn’t able to find enough information about the product to make me feel comfortable with the purchase. After some internet research, I came across a company based in Canada called Heat-Line. We went with the 120-volt version of their Retro-Line, 120 feet long. It cost almost $2,000, but we didn’t have other good options. Pushing the 120-foot heat cable into the water line was straightforward. After all the stress, the work was completed in mid-September.
Finishing joists and floors
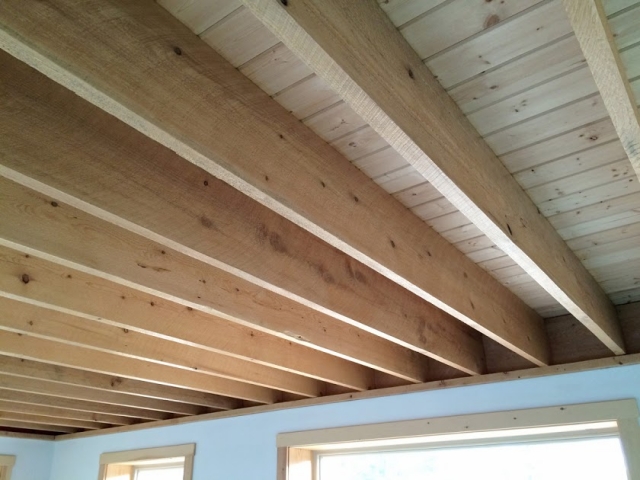
Kyra and I, with help from her dad, continued on various interior projects. I spent multiple days on a stepladder with a face mask and eye protection working on the rough-sawn hemlock floor joists. I used a wire brush to clean them up and did some light sanding. We installed two clear coats of Vermont Natural Coatings.
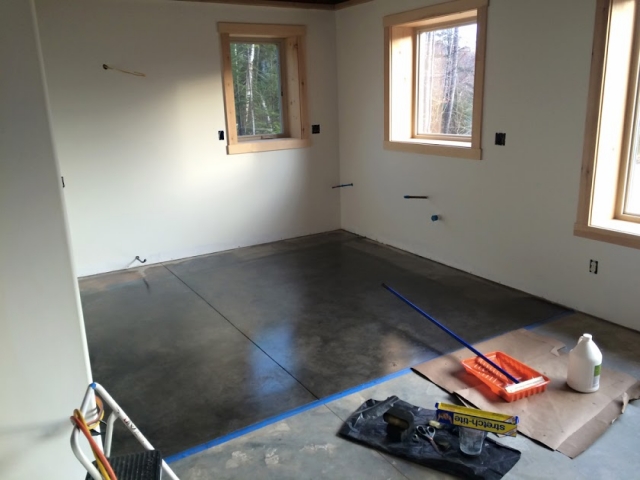
In early November 2014, we started finishing our concrete first floor. We had narrowed down our options to hiring a professional to grind and polish the slab or staining and sealing ourselves. Kyra and I decided this would be a good job to take on ourselves and save several thousand dollars. From Eco Safety Products we purchased several concrete finishing products, including their etcher and cleaner, stain, and finish/sealer.
The first step was to test colors. We did this in an area that would be hidden later; we decided on the “Black Granite” color for most of the floor area.
We tackled the kitchen first so that we could install cabinets before moving on to another floor section. The work was very labor-intensive. The steps consisted of: scrape/sand, clean floor with Simple Green, use etching/cleaning product, let floor dry, install two coats of stain, let dry, and install five or more coats of the finish/sealer.
This work also required a lot of vacuuming, taping, rinsing, and the somewhat impossible task of keeping random debris and dog hair off the floor. The work was tiring, but we were happy with how the floors were turning out. We finished the kitchen and saved the other floor areas for later.
The goal: an occupancy permit
Over the rest of November and December, we continued on interior projects that would help us get an occupancy permit:
- Kyra and her dad put together the cabinet parts that we would install and secure to the walls later.
- Kyra and I built simple open vanities for the bathrooms.
- We had recently hired contractors to tile the shower and bathroom floors, Kyra and her dad installed the shower door.
- Our plumbing contractor came back to install and hookup the toilets, sinks, and hot water heater.
- I used my climbing skills and equipment to replace the plumbing vent flashing on the roof as it had a slight leak from a poor install job.
Speaking of hot water, we decided on a short 30-gallon Rheem electric-resistance water heater because it was cheap, would meet our needs, and would fit in the mechanical room under the stairs.
At this point in the house project, we were working hard towards getting the certificate of occupancy (CO), which we thought we needed to move in. While we had an affordable rental situation with friends, I was really itching to move into the house so we could stop paying rent and not have to commute back and forth.
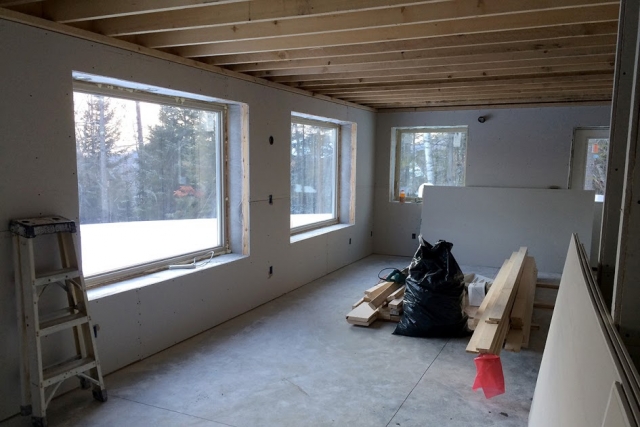
There was no functioning kitchen, but the house had heat and functioning bathrooms (see Image #3, below). One day, I met with the Jackson building inspector about our remaining tasks and found out it was OK for us to move in without the CO. That was all I needed to hear.
Kyra was worried that the house wouldn’t be comfortable to live in yet, but I convinced her to go for it. In a matter of days, we moved all our belongings up to the house and spent our first night on the floor of the guest bedroom. It was December 23, 2014. We had a long ways to go, but it felt great to be in the house.
Editor’s note: This is Part 4 of a multi-part blog series on the construction of Brian and Kyra’s home in New Hampshire. Here is a link to Part 5: Finishing Touches for a Pretty Good House in New Hampshire.
Brian Post is a photographer and website builder. He lives in Jackson, New Hampshire with his wife, Kyra Salancy, and a fluffy black dog. When not working on their house, Brian and Kyra enjoy climbing and skiing in the White Mountains.
Weekly Newsletter
Get building science and energy efficiency advice, plus special offers, in your inbox.




28 Comments
Brian
This is a charming small house.
I may have missed it, but can you tell me how you insulated at the rim joists at the second floor where you have exposed framing?
Exhaust-only ventilation?
Hi Brian,
If you fix the depressurization issue with your bath fans by allowing 60cfm of makeup air, there are still some problems to solve. On a fairly normal winter day in New Hampshire with an average daily temperature of 20 degrees, your two 30cfm passive inlets (they sound so benign) will allow 3,600 cubic feet per hour of air with ZERO heat recovery. Based on your floor plans, your house volume is approximately 9,152 cubic feet. As a result, every 2.53 hours, you've totally replaced the indoor air, the energy in which you've so rigorously tried to preserve by building an airtight house!
Under these conditions, you'd consume over 78,000 Btu/day to replace that lost heat. (During a cold snap of zero degrees, that number skyrockets to over 109,000 Btu/day!) With a balanced ventilation system with heat recovery, you could recover so much of that heat. An 80% efficient HRV would reduce the 78,000 Btu/day energy penalty to about 15,600 Btu/day. A 90% efficiency would lower the energy penalty to about 7,800 Btu/day.
When one exhaust fan boosts to 80cfm, but the 2 passive inlets cannot exceed a total of 60cfm, you still will have depressurization. If both fans are in boost mode, they are trying to move 160cfm but the inlets only allow 60cfm...where does the remaining make air come from to overcome such severe depressurization?
Then there's humidity: in winter, you may experience very low interior relative humidity and, in the dog days of summer, warm humid air enters directly, possible increasing (or even creating) cooling load.
I look forward to hearing how you solved this in a future blog entry!
John Rockwell
Technical Sales Engineer
Zehnder America
http://zehnderamerica.com/
Response to John Rockwell
John,
Wow! 78,000 Btu per day sounds scary!
However, 78,000 Btu per day = 22.8 kWh per day
If this amount of space heating is provided by a ductless minisplit with a COP of 2.5, with electricity costing 18 cents per kWh, the daily heating cost is $1.64.
OK. Not so scary.
In fact, for a variety of reasons, this operating cost estimate is almost certainly too high. Researchers have found lower operating costs for exhaust-only ventilation systems. A CARB study in Chicago found that from mid-October to mid-April, the cost to operate an exhaust-only ventilation system was $75 (about 41 cents per day).
More later, quick note...
Thanks for the questions and input. FYI, we run one fan 24/7 at 30cfm.
John
How much would an appropriately sized Zehnder cost for that house?
Hi Martin,My first comment
Hi Martin,
My first comment started to seem long, so I'll address the comfort issue here. I'm not sure I would want 30cfm of freezing cold winter air entering the bedroom via the passive air inlet. With no minisplit head in the bedroom and the door possibly closed at night, I suspect the Stiebel-Eltron "back up" resistance heat will be used substantially more than originally intended, and possibly, since the minisplit is ductless, act as the primary source of heating.
Does Panasonic's washable air filter remove pollen, etc? Will anybody ever check the air filter, which will accumulate debris, gradually reduce airflow and contribute to increasing depressurization? Will condensation or ice never form on the interior side baffle with temperature differences that can approach 80-90 degrees?
Response to John Rockwell
John,
Most people who own a Zehnder HRV (which can easily cost $7,000 to install) are happy with their ventilation systems. These HRVs are efficient and work well -- although there is a lively debate in the energy efficiency community on wisdom of the electric-resistance heaters that most Zehnder HRVs (especially those installed in cold climates) include.
Exhaust-only ventilation systems based on one or two Panasonic fans are far cheaper to install, and many people with this type of ventilation system are perfectly happy with the system's performance. I haven't heard of any icing problems with Panasonic exhaust fans.
HRV cost
Malcolm- my Zehnder HRV probably cost about $6500 installed on a single level house. Expensive, but I'm happy with it. Super quiet, efficient, handy boost feature when needed. My plumber/electrician/hvac guy was impressed with the quality of the system.
One more thing, John
Here's a little public relations advice: For an equipment manufacturer, the best type of marketing happens when a happy user praises the company's product in a blog or comment.
It's far from clear, however, that an equipment manufacturer gains any advantage by posting a comment on a blog written by a proud owner-builder, in which the manufacturer states, "You chose the wrong equipment. You should have bought our appliance instead." Few readers will conclude that this type of comment is anything but self-serving.
rim joist area
Thanks Malcolm.
Keep in mind that although we were technically the GCs on the whole project and you could call us owner/builders, we had more of a backseat role during the main framing/insulation phase. I'd still say we are building novices, but expert novices compared to where we started!
The 2x6 tongue and groove second floor does extend to the exterior sheathing. The exposed 2x12 hemlock (floor and rim joists) rests on the interior stud wall, so there is still a 5" gap with dense pack cellulose between that and the outer 2x4 wall (again, insulated with dense pack cellulose). So, the weakest insulated spots in this area (ignoring the 2x6 t&g) would be:
-5" dense pack between the hemlock rim joists and 2x4 top plate on outer wall
-5" dense pack between bottom plates of second story walls
I'll attach a couple photos if helpful. Hope that answered your question.
on the matter of HRV's
Just so it doesn't get lost in the back-and-forth, there IS a middle ground between the very expensive Zehnder HRV's and the simple and inexpensive exhaust fans/passive inlets. I find my $650 Venmar HRV to be a good value. It was easy to install, is simple to service and clean, has a great choice of controllers available, and as far as I know is performing as advertised in the range of 70% efficiency.
Brian
Thanks for the reply. I really think you hit the sweet spot between efficiency and design concerns. Hope you are enjoying your house.
ventilation
I'm sure that discussions of ventilation could go on for dozens of comments, there are pros/cons to each setup. And maybe no right answer since ventilation goals can be different. It also depends on occupants, we know the house well and don't really mind the "quirks".
Not to spoil a future post, but we did recently install a 3rd passive air inlet, so there are now 2 in the very open downstairs and 1 in our bedroom. Panasonic's stats say 12-18cfm per inlet, but I think 10cfm is the reality. I think this has given us a relatively "balanced" setup with one of our fans going 30cfm all the time.
Both fans on boost for 160cfm never happens. One on boost for 80cfm only happens when showering. Not an issue spring through fall. In winter, we'll crack a window on warmer/sunny days or just leave that fan on 30cfm and the moisture just takes longer to clear out.
Humidity is ok during the winter (we do monitor it). Mini-split has never been run in cooling mode, just very low dehumidify mode during prolonged heat/humid spells.
As far as comfort, we are comfortable in the house. It's just two of us and a dog. No kids, doors stay open upstairs. I do check and clean the filters. I have seen condensation on the interior baffle/housing of the passive air inlets, but only during the coldest weather and doesn't seem to be an issue. I'll save discussion of ventilation and radon for our next post.
If building again, I would do some type of HRV vs an exhaust system. I think it makes sense for a very well air-sealed house in a cold climate. Retrofitting the house with an HRV is still an option, although the ducting and expense make it unappealing.
vendor comments
I'm not bothered by John's comments or input from others. Although, it would be good to not jump to conclusions...for example, the backup electric resistance heat has been used less than expected.
If anything, I'd encourage vendors to actively participate in discussions because more information sharing about energy efficient building is a good thing...as long as their input is a good faith effort to be helpful and they are following vendor posting guidelines.
homeowner experience
Brian, taking the time to write the detailed construction blog, and THEN responding at length to comments, could be among the most useful things on the GBA website. Where the rubber hits the road with the many products, techniques, and technologies that I for one am seeing for the first time. Thanks for contributing, great little house.
Rim Joists
Brian - Nice house, and thank you for all of the time it took to share with us. That rim joist area seems to be a weak link in the insulated shell, and could easily be improved with more insulation between the hemlock joists, covered by hemlock boards between the joists. The empty bays between the joists are dust catchers that will require at least occasional cleaning.The boards would be an improvement aesthetically, at least to my eye. I've used that detail before with exposed joists. Using Roxul batts would cool down your exterior air barrier(sheathing) thus encouraging more condensation there, but would still allow drying to the interior. Foam would discourage drying to the interior.Thanks again.
The area under discussion
Here's a photo of the area we're talking about.
.
I DID NOT say "you should have bought our appliance instead"
I DID say I look forward to Brian's future blog entry to see if and how these issues were addressed. By you offering unsolicited public relations advice to me, it seems you think I was insincere. That's a bummer.
I happened to switch careers from being an architect to working in ventilation partly because I really believe in the quality and features of the H/ERV's we sell and because I derive so much satisfaction from working in building science and its passionate community of which you, GBA and the commenters are a part.
I never said that every project should have a Zehnder, but I do believe that if the the most important thing is the lowest-cost solution with the shortest payback (and that is perfectly ok), then how are other problems associated with mechanical ventilation handled?
Response to John Rockwell
John,
Brian Post has responded graciously to your comments, and I'm inclined to follow his lead.
I don't doubt your sincerity. But directly or indirectly, you appear to be promoting the products that you sell for a living. That's OK, up to a point. At GBA, blatant commercial messages posted by manufacturers' reps will be deleted, because our comments section isn't intended to be used as free advertising space. That said, we're glad to hear from representatives who understand that policy and who resist blatant promotion, as you have.
We like technical discussions, and you're welcome to join in. I appreciate the fact that you identified yourself as a Zehnder rep from the start.
Zehnder vs exhaust only vs PV
This issue of HRV vs exhaust only really needs to be nailed down. In fact at the basic math level, if I calculate the zehnder at $7000 installed and give it a generous life expectancy of 20 years, it must save $350 per year to just pay for itself. The electricity rate is approx. 18 cents kwh in NH but since the c.o.p. of the heat pump is 2.5 then that is now 7.2 cents kwh. They need to use 4800 extra kwh of heating per year to make it worth while having the Zehnder. No way that they will require that kind of heating extra. So the panasonic exit only wins on economics. I can't speak for comfort though.
By the way a 2.8 kw pv array for $7000 will generate 4000 kwh per year and replacing 18cents kwh = $720 per year savings on electrical bill. That pays back in 9.2 years vs the Zehnder at 20 years. And at the end of 20 years the PV has yielded $4500 profit and is still good for another 15-20 years. I know what I would do.
HRV v. exhaust only
Ven- to me, the extra comfort and IAQ to me is worth $350 per year if your calculations are correct. Don't forget that the exhaust only system costs something, so shouldn't we be looking at the difference in cost between the two, rather than just the $7K for the hrv?
Frankly, the heat savings didn't drive our decision to install the hrv. IAQ did. Poking a few holes in the wall to let in (cold) air to balance the exhaust fans runs counter to our concept of minimizing penetrations to maximize tightness.
A benefit to the hrv is the ability to put exhaust where we wanted it, i.e in the kitchen, both bathrooms and in a little cubbyhole where the cat's litter box lives.
I don't think a 2.8 kw array gets you 4000kwh/year in NH, though. More like 3500.
Response to Stephen Sheehy
Stephen,
Many researchers have compared the operating costs of an HRV to the operating cost of an exhaust-only ventilation system. I published an article on the topic (highlighting a paper by John Semmelhack) back in 2012. Here is a link: Are HRVs Cost-Effective?
Semmelhack wrote, “The amount of site energy saved by the ERV/HRV systems is much lower in the milder climates (330-600 kWh/year) than the colder climates (800-1,100 kWh/year). The lower energy savings in the milder climates leads to poor cost-effectiveness when compared to other energy-saving or energy-producing options such as extra insulation or a photovoltaic system.”
Reply to Martin
As I said to Ven, energy savings wasn't the primary concern. In any event, if Semmelhack is correct, here is Maine the energy penalty shouldn't be too bad. We also planned our PV array to roughly match our electric power use.
Reply to Stephen Sheehy
I actually think that high efficiency HRV is a great idea. I am sure the guy who invented it deserves praise. Absolutely the only thing wrong with them at this time is that they are too expensive. I don't understand why they are so expensive. Perhaps it is not a large enough market, or companies are charging what the market will bear. They seem to be quite a simple gadget after all, although I don't have enough hard facts to assert that with confidence. So yes...like PV used to be, it needs to fall in price by at least 70% and then they will be in the right price range, especially in very cold climates.
A 2.8 kw pv array in Concord NH gets 3743 kwh per year at 40 degree fixed tilt. according to PV WATTS calculator.
cost and advice
Our ventilation is setup is almost all DIY except for a couple hours of electrician time. I don't have exact numbers, but I'd put the cost in the range of $750 to $1000 for two fans, passive inlets, ducting material, wall caps, electrician time, and miscellaneous supplies. Call it $1500+ if it wasn't DIY.
Examining the cost of a ventilation setup is important, but should be one of a few factors to consider. And as another person commented, there are good HRVs in lower prices ranges than Zehnder.
To sum it up again to help others that are deciding on ventilations systems: we are happy (or at least satisfied for now) with our current exhaust fan and passive air inlet setup, we understand the operational quirks and it works for our situation. But after having gone through the build process and living in the house for a full year, I'd recommend some type of HRV for a tight house (under 1 ACH50) in a cold zone 6 climate.
I like the home and the blog
I like the home and the blog about all and the discussion.
As to fresh air... I love opening windows myself, and just plain being out of buildings and cities. I just travelled down our local lake last night with no moon, just shore lights, flat water, no other boats. That is one hell of a way to spend an evening. Stopped in the middle of the lake, engine off, nice.
So... me... I like a fire for heat, a window for air, and the outside as much as possible. My dream house is a radiant heated earth area surrounded with sailboat sails for a bit of wind block, a bonfire blazing... for heat, cooking, entertainment... snow near, a stream and waterfall near, mountain near, rock ledges near, deer... oops.... dreaming again... time to wake up.
Thanks to all that discussed HRVs.... very insightful. I am cracking my window HRV right now thanks to all...
Ventilation option?
Great project! Its been informative to follow your progress. Thanks for the blogs.
Following up on your comments on 12/10/15: "If building again, I would do some type of HRV..... Retrofitting the house with an HRV is still an option, although the ducting and expense make it unappealing." it occurred to me that a pair or two of the Lunos ventilators may now be an elegant solution. I don't have experience with the product but have been been impressed with the concept, particularly for retrofit, lower cfm applications. Your compact, open floor plan may be a good match for this ductless approach. It will be nice to hear from other readers that have experience with the Lunos units.
retrofit Lunos vs HRV
Thanks.
I've looked into and thought about the Lunos system quite a bit. Overall, I came to the conclusion that a standard HRV would make more sense as a retrofit. A few main reasons:
a decent Fantech or Venmar or other 120v HRV could go above our washer/dryer, easily taking advantage of existing drain line and nearby outlet......two pairs of Lunos e2 would require more extensive electrical work plus connecting them together to sync
HRV could handle our continuous ventilation needs plus bathroom exhaust, could then take out bath fans and passive air inlets......with Lunos, would still need a bath fan and probably need to keep some passive air inlets
dealing with HRV interior ducting would be a pain, but manageable using the open floor joists and building a chase or two, could probably also use an existing 4" bath fan exhaust for HRV exhaust, meaning only one new hole in wall for HRV intake
if I installed myself (which I think I could do), a mid level HRV (Fantech, Venmar, etc) installed would probably be the same or less cost than Lunos (would need electrician help)
That's what I can think of for now. The Lunos system looks great and I'm sure it works great in applicable situations, but can't see it working for us.
Log in or create an account to post a comment.
Sign up Log in