Update to “Attic insulation quandary”
This is an update to the “Attic insulation quandary” question posted last year. See the following links for a description of the project:
https://www.greenbuildingadvisor.com/community/forum/gba-pro-help/93581/attic-insulation-quandary
https://www.greenbuildingadvisor.com/blogs/dept/qa-spotlight/how-insulate-attic-1910-remodel
We completed the SPF insulation of the ceiling and have drywall over the SPF. Didn’t get to the new windows step before the snow came. Boarded up the openings, tarped and insulated for the winter.
I wanted to pass along an update in the hopes that our experience will assist others that are faced with a similar project.
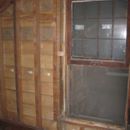
Decided to insulate from the inside since the plaster had many cracks and was going to need attention anyway. Mold was a possibility. We are happy with this decision. We were able to work inside, out of the elements and were not interrupted by weather events.
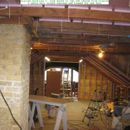
Laid down a layer of plastic over the floor followed by scrap carpet and cardboard from boxes. Stapled carpet and cardboard to the flooring so it wouldn’t slide. Worked well. To do it again, would skip the carpet and go with just cardboard. Sweeping up debris on carpet wasn’t as easy as the cardboard.
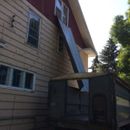
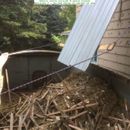
We borrowed a large grain truck and rigged a chute from scrap metal siding below one set of double-hung windows to direct the debris into the truck box. As plaster, lathe and insulation were removed from the walls/ceiling, we dropped it onto a tarp making sure not to put too much on the tarp for one person to handle and to fit through the window into the chute. The debris was rolled into a ‘debris burrito” dragged to the window opening and snaked out the window onto the chute. Gravity would do most of the work at that point. Dealing with plaster and lathe together was a bit of a hassle – the lathe was full of nails and would catch on the tarp when trying to get the debris rolled up and dumped out the window. May have been easier to pick it out, set aside and dump separate from the plaster. We salvaged quite a bit for burning in the fireplace and for later winterization.
After trying a few techiniques, mainly used crowbars for removing the plaster and lathe together. Would first break up the plaster using the crowbar or a hammer. Then used a crowbar to separate the lathe from the stud/rafter – if there was sheathing on the other side of the wall or roof, could use that as a fulcrum for prying the lathe away from the 2x stud/rafter. Other times, used the hook of the crowbar and the inertia of the bar to act like a dent-puller to hammer-pull the lathe away from the 2x stud/rafter. I’ve got a video that shows the techniques that were used. Will post to YouTube eventually.
It was dusty; used a couple of box fans to ventilate the space and always wore masks and eye protection. I wore a helmet during all of the demo.
At the knee walls, initially left the baseboard (1’ tall) in place and removed the plaster and lathe to make working behind the knee walls easier. Had fiberglass batts to remove prior to preparing for SPF. Eventually removed the baseboard as well as this was going to be difficult to work around when doing the SPF. The baseboard would have blocked the lower 1’ of the exterior wall (S gable) that got SPF – making the job more difficult.
Between the 2 ft OC 2×6 rafters were 1×6 rafters toenailed to the roof deck (in one place) and supported by the knee walls but not extending into the kneewall space by much. A 2×4 chord spanned the 1×6 to form the horizontal part of the loft ceiling just like the chords joining the 2×6 rafters. Asked a local architect about this and the opinion was that it was necessary when doing plaster and lathe – 2 ft OC was too much of a span – the lathe would flex too much when applying the plaster. Decided to pull these 1×6 members out of the structure – make more room for SPF and prevent more thermal bridging than was necessary. The styrofoam baffles for venting the underside of the roof deck were also 2’ wide – would have had to split to make them fit the 1’ wide cavities.
The horizontal ceiling of the dormer section was the same 1 ft OC 2×4 chords. We removed the extra ones, keeping a 2 ft OC spacing of ceiling joists. This was also necessary to have room to repair the sagging dormer roof. The rafters here were 2×6 and the span was way too long for just a 2×6; ~15 ft. Decision was to sister a 2×10 alongside each existing 2×6. Used (5) 2×10 16’ long trimmed eventually to ~15’. Did what we could to remove the existing sag in the center of the roof. Also noticed that the roof deck here was plywood, not 1x boards as in the sloped section of the roof. Seems that a prior owner had to repair the roof deck of the dormer some time earlier. We will find out when doing the roof summer of 2017.
Preparation for SPF
Used brooms and leaf blower to get all the residual insulation, dust etc out from the nooks and cavities of the roof deck and framing. Wanted a clean surface for the SPF to bond to. Eventually vacuumed the work area floor – nice not having a dusty area to work in. Worth the effort in my opinion.
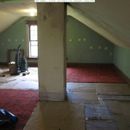
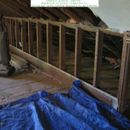
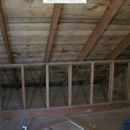
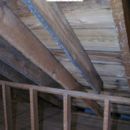
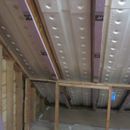
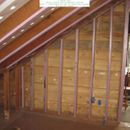
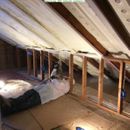
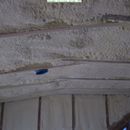
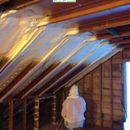
Next step was inserting baffles between the rafters. These were designed for 2’ OC spacing and went in fairly easy. They were W shaped – 2 chambers to allow the air to travel from eve to attic. Stapled along each side and in the middle of the W. See pictures. In many places, they didn’t quite fill the 2’ width of the rafters so there was some roof deck that got hit with SPF. Don’t expect it to be a problem; it is what it is.
For zone 7, code for an attic is R49. With just a 2×6 for rafters and 1” baffle under the roof deck, 4 inches of SPF is the most that the SPF guys would attempt (½” space to drywall). With 4” of SPF, the R of the assembly for 16” oc I calculated at R20.7. I used 16” OC because I had that framing factor; will be better due to 2’ OC. Adding 1” foam furring strips to bottom of rafters and increasing to 5” of SPF increases to R27.8. Increasing to 1.5” furring foam strips would give an R31.21. Decided to add 1” XPS strips to the underside of the rafters prior to SPF. Did this for the ceiling behind the knee wall as well as the sloped ceiling in the living space. Downside is needing longer screws when doing the drywall and some concern about the screws popping. Risks seemed worth the increased R payoff. Also only gave up 1” additional headroom on the sloped section. Seems like a reasonable compromise; didn’t get to R49 but didn’t have to add extra framing to lower the sloped ceiling to make more room for insulation.
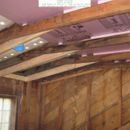
For the horizontal portion of the ceiling, needed a backing for the SPF. The chords here were only 2×4. To provide more depth for SPF, we added 1” XPS strips on top of the chords and then 1” XPS boards on top of those strips. The cavity depth is then 4.5” allowing 4” of SPF. I calculated an assembly R of 26 for the flat section of the ceiling. Similar to the sloped ceiling section.
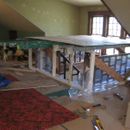
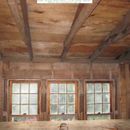
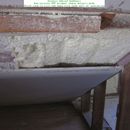
The foam strips were secured on top of the chords using a finish nailer; went pretty fast. The 1” XPS sheets were held in place using zip ties poked through a small hole in the sheet, along side of the chord. The zip tie was then stapled to the chord to hold it down so the SPF application wouldn’t dislodge the sheet. It worked. See pictures. The 4×8 sheets had to be cut to 2×8 in order to transport them into the loft area and to snake them between the chords into the attic cavity.
In addition to insulating the ceiling with SPF, we also decided to do the walls of the dormer and the south gable wall. The north gable wall will be insulated from the outside with SPF as planned for the rest of the exterior. By doing the dormer from the inside, won’t have to deal with exterior insulation along the roof line. Just have to remove the exterior siding and replace it with new. Also separates doing the new shingles from having the exterior insulation completed.
The SPF installers were able to complete the spraying in 1 long day. They use the 2 lb closed cell Lapolla product. This was my first experience with SPF; I learned a lot. If the SPF is proud of the rafter/stud then the trimming is going to be a lot of extra work. During the planning steps with the installer, I made it clear that in the knee wall area I was going to be R ‘greedy’ and I would deal with the trimming that was necessary. Wasn’t important to have a nice drywall finish here; just needed an ignition barrier. Wanted more insulation where an ice dam may form as well.
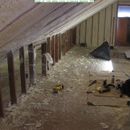
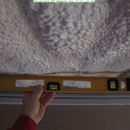
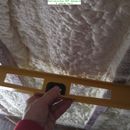
Typically, they would spray a cavity in one or two passes and when the foam had expanded, use a scraper or curry comb to remove the overspray from the faces of the stud/rafters. Easier to do when the SPF hasn’t fully cured. Using the curry comb is effective but creates a lot of loose debris. We were using metal straightedges and levels to span between rafter/studs to check for SPF proud of the faces and trimming those spots.
For the 1” foam strips secured to the rafters, we applied masking tape to catch the overspray. Could then pull the tape and not have to scrape over these foam strips. This worked well – except we pulled the tape before the all of the SPF was finished. Had overspray to remove from them.
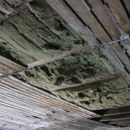
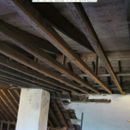
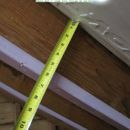
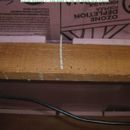
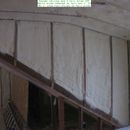
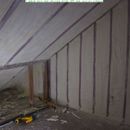
To do it over, I would be inspecting the SPF with a straightedge as they completed a section and marking areas that could hold more SPF without being over-sprayed so they could do another pass to hit these low spots. I was trusting that they were getting a good fill in each of the cavities. Bad assumption; I didn’t know that I had that role. Obvious once I look back at the day and wish that they would have advised me that this would have been helpful to them – spot areas that need more SPF so they can be addressed that day and not on a return trip. Not easy to gauge by eye when the framing is 2 ft apart. See pictures for a few examples of variable gaps.
QUESTION: I am considering adding insulation to fill the gap between the drywall and the SPF. The gap will vary from 0 to 1.5” or maybe 2” in some spots. Could make small holes in the drywall to insert the insulation. No taping or texture on the drywall yet; now’s the time to fill any known large gaps. Any product recommendations? Open cell vs closed cell? One idea is to use cans of Great stuff, poke a small holes in the drywall for the stem of the applicator to fit through and inject some foam. Runs the risk of pushing out the drywall if not enough room for the Great Stuff to expand.
GBA Detail Library
A collection of one thousand construction details organized by climate and house part





Replies
Tim,
You win the award for the longest question ever posted on GBA.
Thanks for the update (although frankly I'm not sure how many GBA readers are going to go back and re-learn the conditions you were trying to address). It sounds like your renovations are going successfully.
Q. "I am considering adding insulation to fill the gap between the drywall and the spray polyurethane foam. The gap will vary from 0 to 1.5 inch or maybe 2 inches in some spots. Could make small holes in the drywall to insert the insulation. No taping or texture on the drywall yet; now’s the time to fill any known large gaps. Any product recommendations? Open cell vs closed cell? One idea is to use cans of Great stuff, poke a small holes in the drywall for the stem of the applicator to fit through and inject some foam. Runs the risk of pushing out the drywall if not enough room for the Great Stuff to expand."
A. I would skip this step. Lots of hassle for low reward.
-- Martin Holladay
Thanks Martin.
I was looking for a way to provide an update on the project and ask a question as well.
What would you suggest I do for providing updates?
Thanks
Tim
Tim,
You are perfectly welcome to post updates as you did (and I'm sure many GBA readers, including me, are interested in hearing about your progress).
If you ever get more ambitious, and want to author a guest blog, feel free to contact me by email:
martin [at] greenbuildingadvisor [dot] com
If you tag on a question at the end of a very long post (as you did), there is always the chance that most readers will miss the question.
-- Martin Holladay