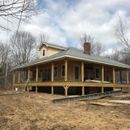
Hip roof in Zone 6A
My client is a builder who has already completed the exterior siding and roofing of a new house in coastal Maine (zone 6A). The hipped roof and 2×6 walls have no exterior rigid insulation and no air space between cedar shingles and Typar. Walls: 2×6 with R-21 batt (John Mansfield), 1/2″ CDX, Typar, cedar shingles. He plans to install shiplap hemlock paneling to the interior. Roof: Hip, 6 in 12 pitch, 2×10 rafters into (2) 11 7/8″ hip rafters. Also has two dormers.
Assuming we go with an unvented assembly, how do we best achieve a vapor seal?
I was thinking of specifying closed cell spray foam in the roof and using spray foam to seal floor/wall joints and applying 2″ foil faced polyiso rigid foam, taped and sealed, to the under side of rafters. But any thickness to the interior of the walls will cause difficulty, so do we apply 6 ml poly to interior of studs? Will some kind of glue to all paneling joints and a urethane finish give us a seal?
We will need R-49 in the roof and at least R-20 in the walls.
GBA Detail Library
A collection of one thousand construction details organized by climate and house part


Replies
User-6825743,
It's a little late in the process to be asking these questions... Ideally, this roof would have an adequate thickness of rigid foam on the exterior side of the roof sheathing. Now it's too late for that.
If you want to create an unvented roof assembly without using exterior rigid foam, you have only one choice: closed-cell spray foam against the underside of the roof sheathing. In your climate zone (Zone 6), that means you'll need R-25 of closed cell foam (4 inches) along with R-24 of fluffy insulation (fiberglass, mineral wool, or cellulose) in direct contact with the interior of the cured spray foam.
For more details, see How to Build an Insulated Cathedral Ceiling.
On the walls, it's much more important to come up with a durable air barrier than to worry about a vapor retarder. I strongly suggest that you install drywall with taped seams (painted with vapor-retarder paint) before installing the hemlock boards. Make sure that the drywall is installed with attention to airtightness.
-- Martin Holladay
Martin, I'm curious--why do you recommend drywall as the interior air barrier/vapor retarder, rather than a flexible membrane such as Pro Clima Intello, Siga Majpell or Certainteed Membrain, which cost less than drywall and are easier to install?
Michael,
I've always been an advocate of rigid rather than flexible air barriers -- out of concerns over durability and job-site abuse. But some of the delicate membranes -- more delicate than drywall -- can work, as long as everyone on the job site understands that holes and rips must be repaired.
We also have good evidence that fastener penetrations through drywall don't result in air leaks; with some of the new membranes on the market, I'm not sure that we can be confident that hundreds of fastener penetrations might not lead to air leakage issues.
-- Martin Holladay
My builder really doesn't want to use a layer of drywall to the interior of the walls. Can we avoid it by doing a "flash and batt" scheme there: 2" closed cell spray foam + 3 1/2" cellulose or batt? Then hemlock paneling?
User-6825743,
Needless to say, if you don't want to take my advice, you don't have to.
The flash-and-batt approach works, but it doesn't guarantee that your wall won't have air leaks. You can still have air leaks between doubled studs or doubled top plates. Moreover, spray foam installers aren't perfect. They can miss a few areas.
Even when you adopt the flash-and-batt approach, I'm a strong believer in the value of an interior air barrier. If you don't want to take my advice, at least do some blower-door-directed air sealing after the insulation work is completed, to try to address the air leaks.
Another possible approach -- inferior to the use of drywall, but better than nothing -- is to install a flexible material like MemBrain on the interior side of your studs.
-- Martin Holladay
Thanks for your advice, Martin. I fully appreciate your help in this after the fact sticky situation. It's nice to have more than one option.
How can I contact this person? I have questions on the layout of this house
With only 9.25" of roof rafter depth you can't get to R49 with a 51% closed cell 49% fluff solution. But you can get there (barely) with 4" of an R7/inch HFO blown closed cell foam (not the R6 & change HFC blown goods) which would give you ~R28, and rock wool R23s (compressed to 5.25") delivering about R22.
That's about a 56%/44% ratio, but it would still need an interior side air barrier, and a finish ceiling (or vapor retarder) of less than 10 perms. Thin drywall painted with half-perm latex would be more robust than a sheet membrane approach, but if you must Intello or MemBrain would work (on paper, anyway.)
The alternative would be 6" of HFO blown closed cell foam (R42) and kraft faced R13s compressed to 3.25" (R12) or R15 rock wool batts (R14) and housewrap or other cheaper broad-sheet air barrier. With a 75% or higher foam ratio the vapor permeance of the finish ceiling doesn't matter, nor does minor air leakage. While you can also hit the letter of code with 7-8" of HFO blown foam, a complete cavity fill of some type of insulation is warranted, since that increases the length (and R-value) of the thermal bridge through the rafters. A 7" path through hemlock rafter is about R8.4, but a 9.25" path is R11+, about a 25% reduction in heat transfer through the rafter. That's a difference you can literally see in the morning after a night that puts frost on the shingles, no infra-red camera needed.