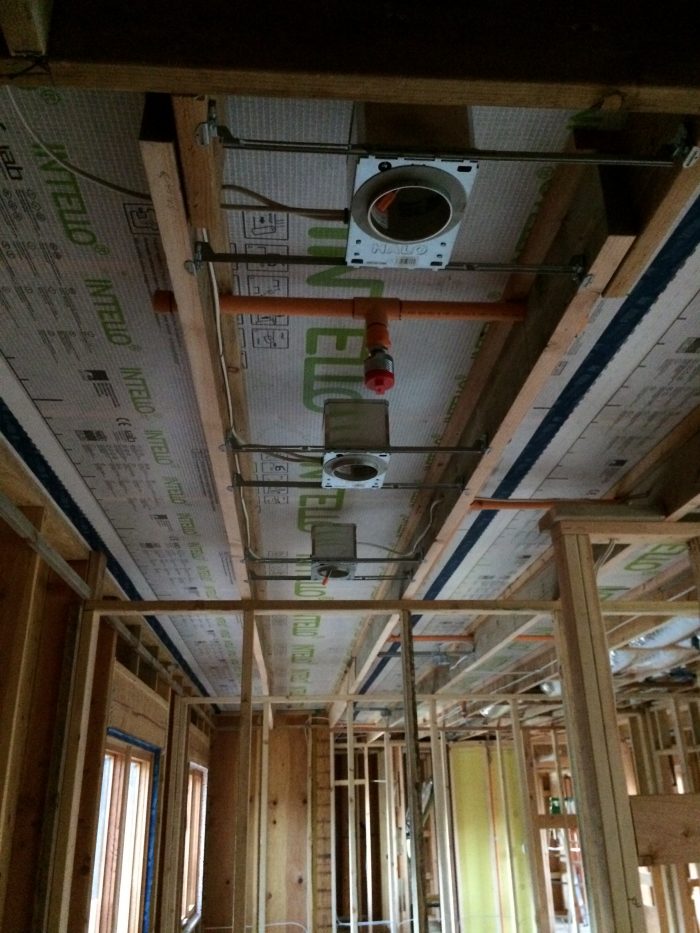
There are many construction methods and materials designed to make a home close to airtight. Their success depends on continuity of the air barrier that separates conditioned spaces from those outside the building envelope. Continuity is easily achieved when there’s nothing penetrating the air barrier. But there are occasions when plumbing, electrical, and/or ductwork systems end up outside the building. For example, forced-air heating and cooling ducts that leave the conditioned space because there was no space to keep them inside the house. The solution to this problem is to integrate a service cavity.
A service cavity is an intentional space between the finished side of a wall, ceiling, or floor and the air barrier. This space or cavity is designed to contain mechanical, electrical, and plumbing (MEP) systems. The service cavity might be large enough to house heating and cooling ducts, or small, to hide electrical wires.
Air barrier continuity
The easiest way to keep MEP systems inside the building envelope is to make the exterior sheathing on the walls and roof, along with whatever system is used for the floor, the primary air barrier (see Joe Lstiburek’s Perfect Wall). Building this way makes the entire structure a service cavity. This is a great way to build but there may be instances when you can’t—or don’t want to—use the exterior sheathing as the air barrier (for example, my recent Barndominium project did not have structural sheathing).
Most homes in my cold climate combine air and vapor control in one layer. This strategy often uses a membrane attached to the “warm-in-winter” side of an exterior wall or ceiling. (This assembly can include an interior vapor barrier and should not be used in hot-humid climates.) Traditionally, the structure is framed and installation of the…
Weekly Newsletter
Get building science and energy efficiency advice, plus special offers, in your inbox.

This article is only available to GBA Prime Members
Sign up for a free trial and get instant access to this article as well as GBA’s complete library of premium articles and construction details.
Start Free TrialAlready a member? Log in


5 Comments
Great overview. My only caveat would be to think through what will actually be in the service cavity before deciding it is necessary - or necessary everywhere in the house. Often exterior walls or ceilings only contain one or two penetrations for electrical boxes, which are easily sealed and don't warrant the time and space necessary to create a cavity for them.
One service cavity I've found useful is to run waterlines in 3" or 4" PVC pipe under slabs., which makes modifications and replacement a lot easier.
Those trusses look nice. I can see the benefit of a central trunk running through the house like that.
Kyle,
Here is another GBA article on plenum trusses:
https://www.greenbuildingadvisor.com/article/use-plenum-trusses-to-keep-ducts-out-of-your-attic
Stephen Sheehy used a variant in which scissor trusses give sloped ceilings in most areas, but some service rooms have flat ceilings, which form service cavities.
https://www.greenbuildingadvisor.com/article/windows-and-floors-at-a-pretty-good-house-in-maine
I installed a 2x3 wall service cavity (would use 2x4 if re-doing it) and used 1x4 strapping in the ceiling in the house I'm building. My local inspector had never seen either, in all of the thousands of homes he'd inspected!
The 2x3 wall cavity was straightforward enough as he just treated it the same as any standard 2x4 wall. The strapping did require some discussion, especially related to the electrical and pex. I kept the sensitive bits away from the strapping enough that he concluded that it was very unlikely that a drywaller would miss the strapping and screw through the wire/pipe, and so he passed it.
But yeah, there is no existing standard for anything of the sort here in the Phoenix, AZ area so every use is going to be case-by-case.
The service cavity approach is excellent, also one of simplest and most effective ways to maintain continuity of air and vapour control layers.
On a recent “code min” build we first framed all of our exterior walls and completed the truss system and roof. This created a large open space to work in. We pre-planned electrical, ventilation and plumbing (hose bibs, plumbing vents, outside receptacles, bathroom fans etc) penetrations through our exterior walls and ceiling and prepped accordingly. Insulated ductwork was installed in the attic (would do a plenum truss next time but it worked)
Once that done we installed and detailed Intello over the entire ceiling and strapped with 2x3 on edge. Next our insulators filled the attic with loose fill and BIBS in the walls. From there we installed Intello and 2x3 strapping on all of the exterior walls and we were left with a wide open 2500’ space that was completely air/vapour tight and we could very quickly frame partition walls.
Our plumbers and electricians found that doing the rough-in process from “inside” to be very simple and quick also since we were dry, insulated and airtight at this stage we could easily heat the space with the small construction heater making mid winter rough-in super comfortable.
Overall, we felt that the process was extremely efficient. The most important detail was planning a sequence strategy that didn’t force subs to make too many extra trips etc. This is an approach we will continue to tweak and I can see using it whenever possible.
Log in or become a member to post a comment.
Sign up Log in