

More Building Science
You may recall that in 2021, Zehnder America gave me one of their premium energy recovery ventilators (ERV) with all the components I needed to get it up and running in my house. It’s taken longer than I wanted to install it, but I’ve made huge progress. Recently, three friends—all used to work for Zehnder—came to Atlanta to spend a weekend helping me install my ERV. Here’s an account of how it went, along with some tips for your own installation.
Zehnder ERV basics
The Zehnder energy recovery ventilator (OK, it’s actually an enthalpy recovery ventilator, but let’s keep it simple here) provides an efficient way of bringing outdoor air into your home to dilute indoor air pollutants. But it also exhausts air from indoors at the same time. The two air streams pass by each other through the capillary core in the ERV, exchanging heat and moisture.
In plain language, it doesn’t hit you with blasts of cold air in winter or hot humid air in summer. The cold winter air gets warmed up on its way to you by the heat exchange that happens in the core. The hot, humid summer air coming in gets pre-cooled and dried out a bit on its way in. But remember: Ventilation is only one part in a layered approach to good indoor air quality.
Now, one of the really nice things about the Zehnder ERV is that it’s a complete system. It includes the all the stuff you need to pull in outdoor air and distribute it throughout the house as well as extract stale air from the house and send it outdoors. This system also has some nice controls to adjust the air flow, boost the flow when needed, and more.
The distribution system is clever. You have two big ducts connecting the unit to the outdoors. On the house side of the air flow, there are two manifolds with built-in silencers. The unit connects to them with large ducts on one side. On the other side, as you’ll see below, are a bunch of ports for smaller tubes that connect to the vents that extract or supply air from or to the rooms.
Got that? If not, follow along and it should start making more sense.
Getting started
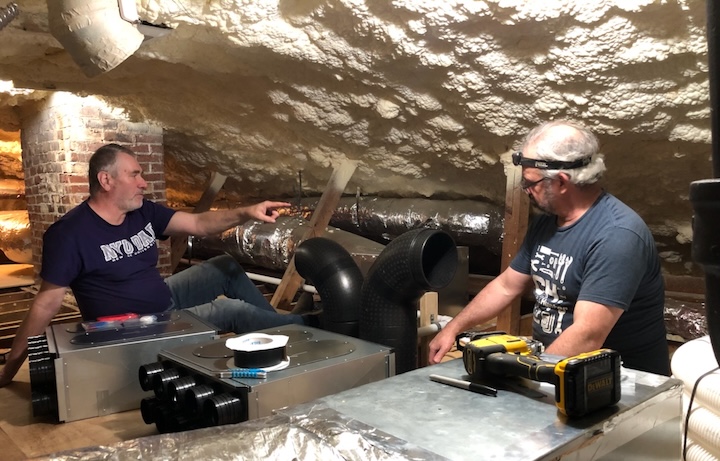
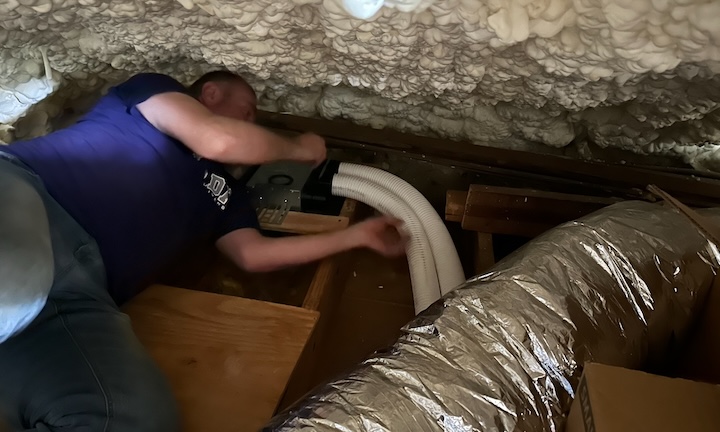
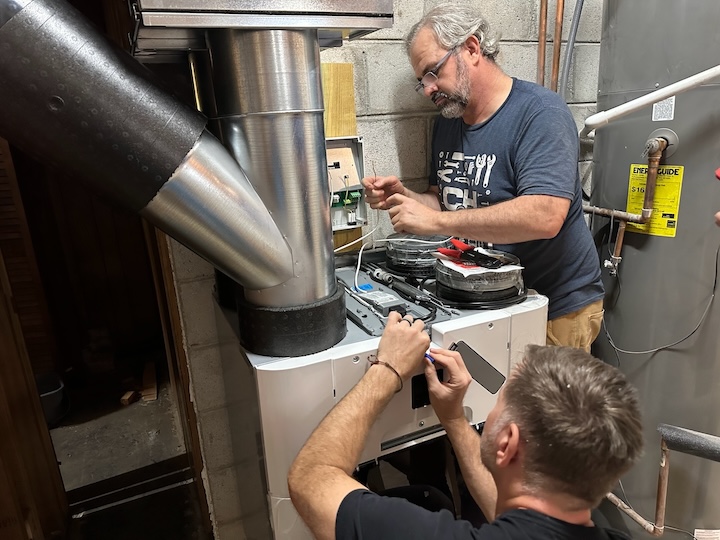
My three friends—John Rockwell, Chris Smith, and Aubrey Gewehr—are seen in the photo below in the mechanical room, scoping out where to set the equipment, how to run ducts to the outdoors, and how to get ducts up to the attic.
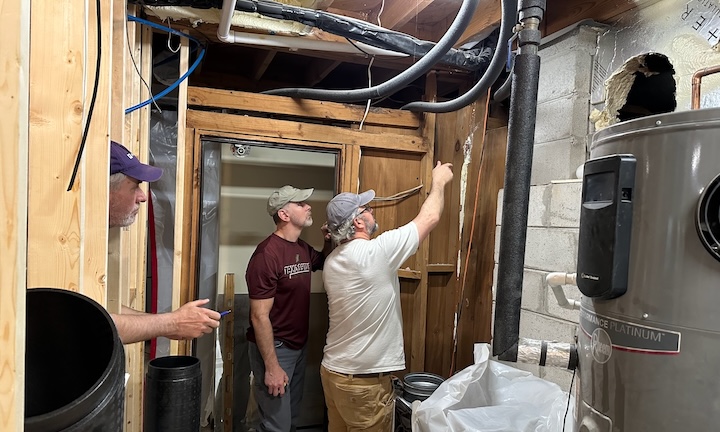
At that moment, we were trying to figure how to run ducts to the attic. We had a couple of chases to use, but first we had to do some demolition. The old furnace flue was still in one of the chases, so we had to get it out.
We did some other things I haven’t documented here as well, such as moving a PVC condensate line that was in the way, installing some of the ceiling vents, and preparing materials.
First big accomplishment
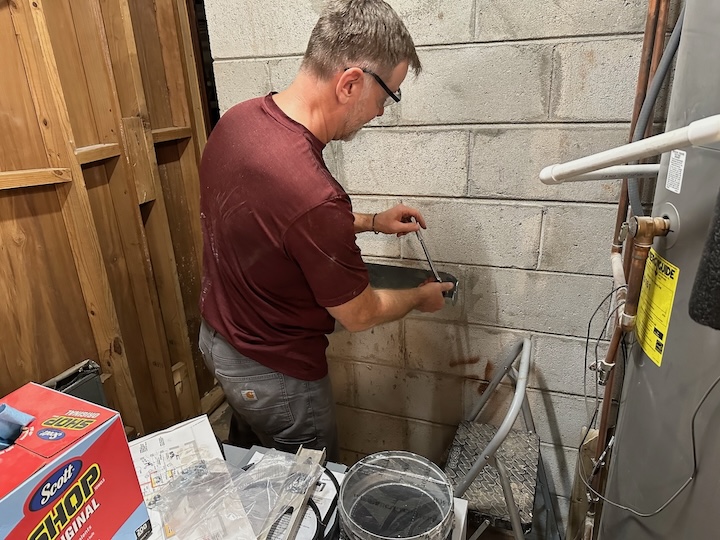
About the last thing we did on day one was to mount the ERV on the wall. The photo above shows Chris bolting the bracket to the block wall to hold the unit.
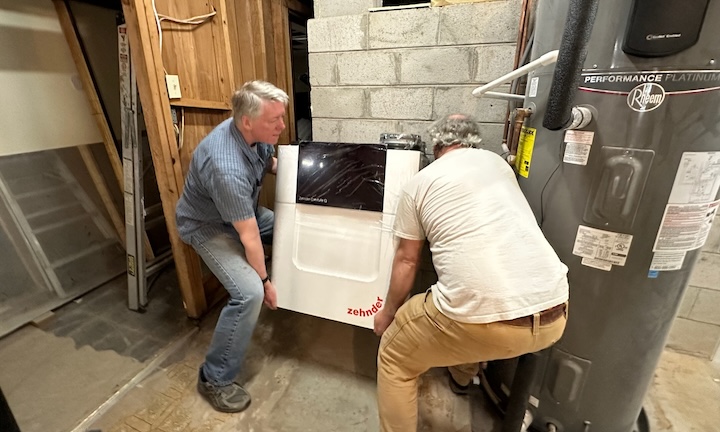
Then Aubrey and I lifted the 100-lb. precision Swiss ventilation machine and set it onto the bracket.

Connecting basement unit to attic ducts
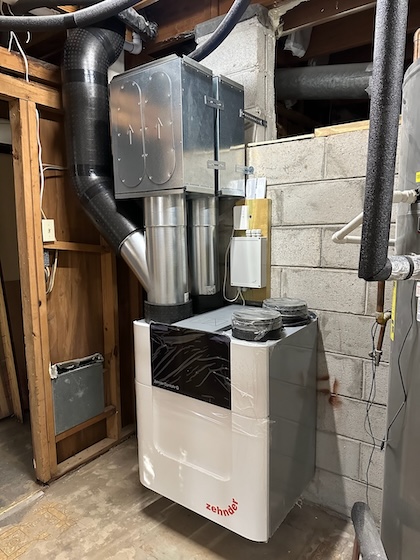
The chases had been cleared out in advance of day two’s work, and some of the expanded polypropylene ducts were already installed. We were ready to connect vertical pipe over to the unit hanging on the wall. This meant using a lot of the 45-degree elbows that came with the system.
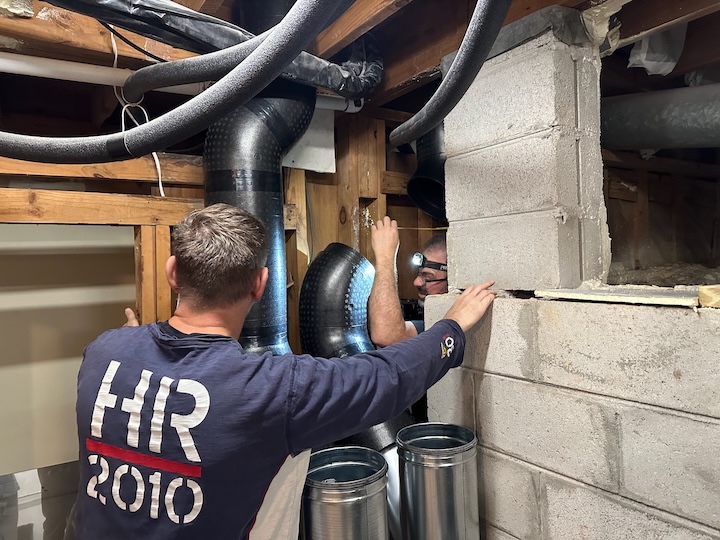
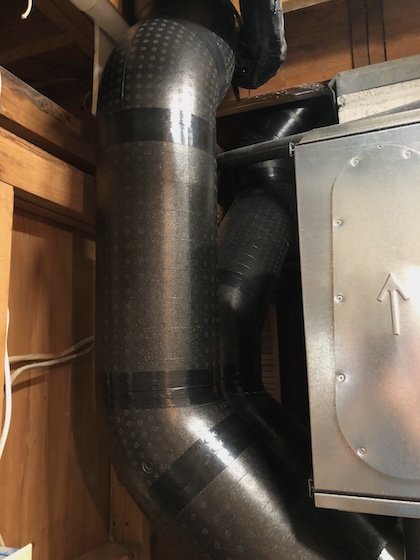
Once it was all connected in the basement, the two ducts came down the chases, turned, and went into the unit (not visible in above photo) at a 45-degree angle. The metal box you see to the right of the black ducts is one of the basement manifolds. It’s pretty neat installation, I think.
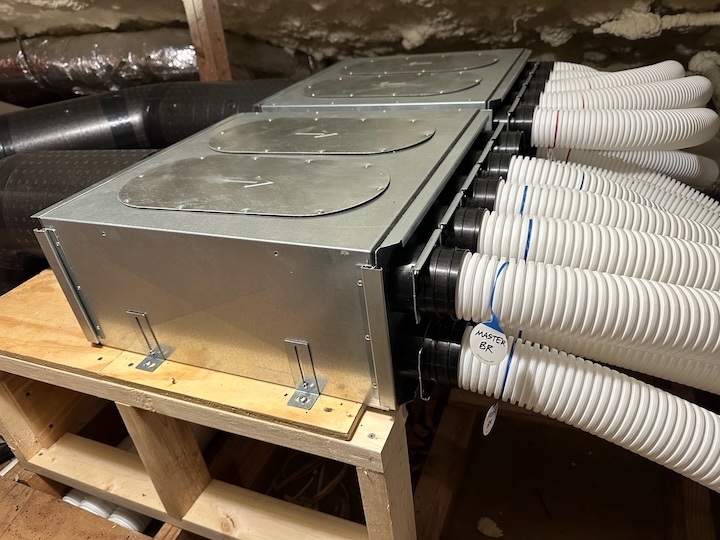
ComfoWell manifolds
We installed the manifolds, too. In the basement, two manifolds are mounted directly on top of the unit. They sit on top of the vertical section of the wye coming out the top left side of the ERV. You can see them in the second-to-last photo at the bottom of the article. In the attic, we did things differently.
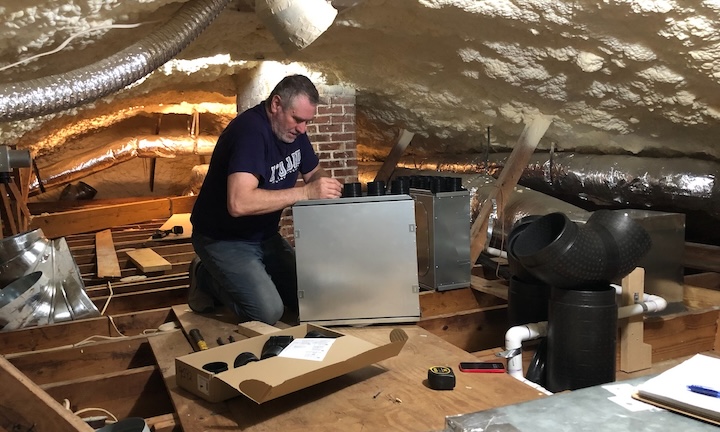
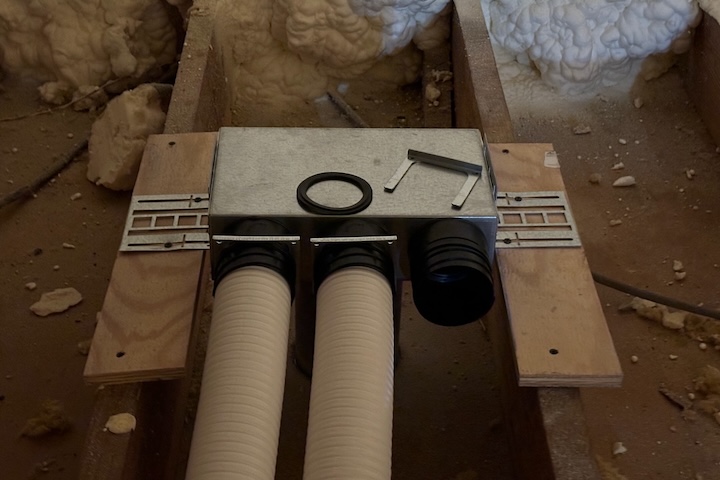
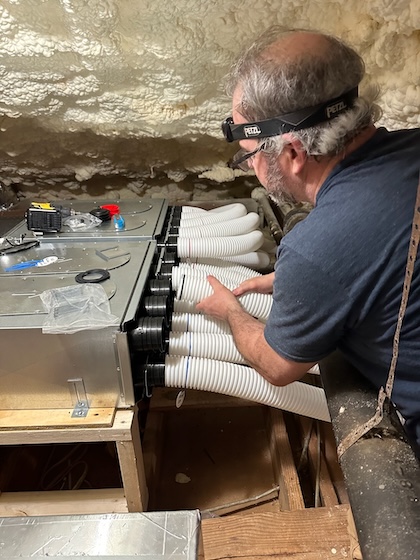
John assembled the manifolds in the attic (above photo). One end has a plate with a big hole for the big duct. The other end has a plate with a bunch of small holes for the small ducts, called ComfoTube.
You may be wondering about the two sets of manifolds. Basically, the layout has two branches, one for the basement and one for the main floor. The manifolds in the attic serve the main floor, and the ones in the basement serve the basement. But it’s not like a zoned heating and cooling system because they’re not controlled separately.
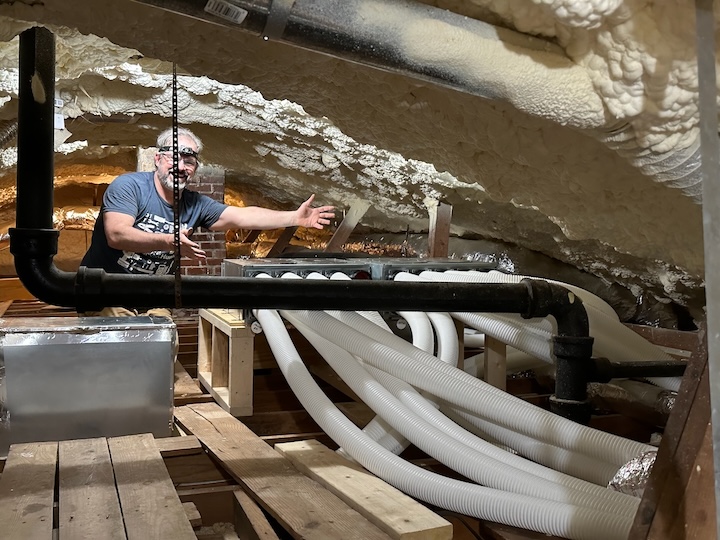
When we had the basement and main floor ceiling vents done, we all went to the attic and discussed possible ways to mount the manifolds. In the end, we decided to build a platform that would hold both manifolds horizontally, as you see below.
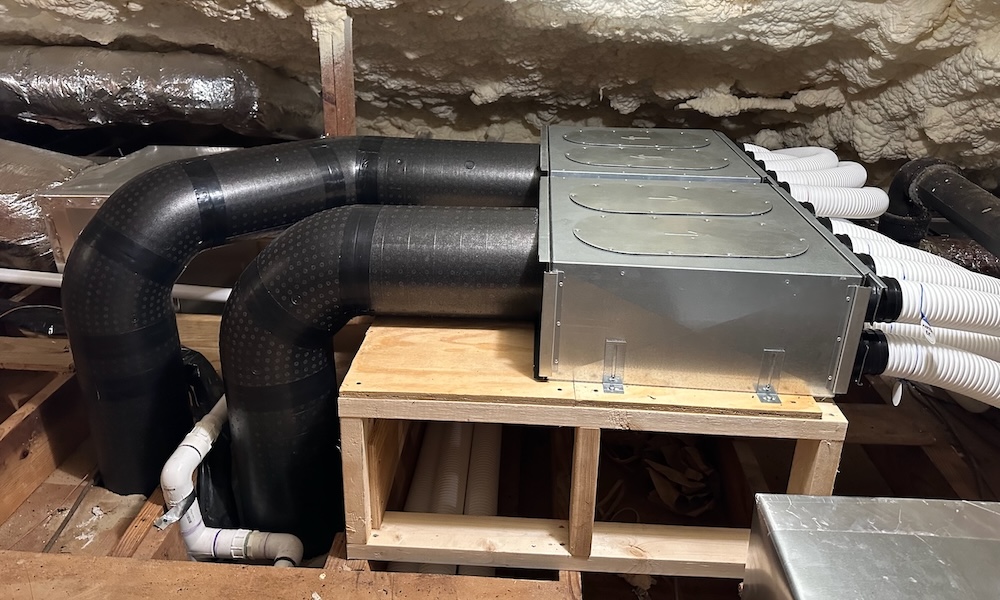
The big ducts come up from the basement on the left. The small ducts come out of the ports on the right. Once we figured out how to do it, it went together quickly.
Ceiling vents
When John put together the quote and materials list for me, he started with the air distribution schedule. It shows the rooms in the house, where the stale air gets extracted, and where the outdoor air gets supplied. That’s it below.
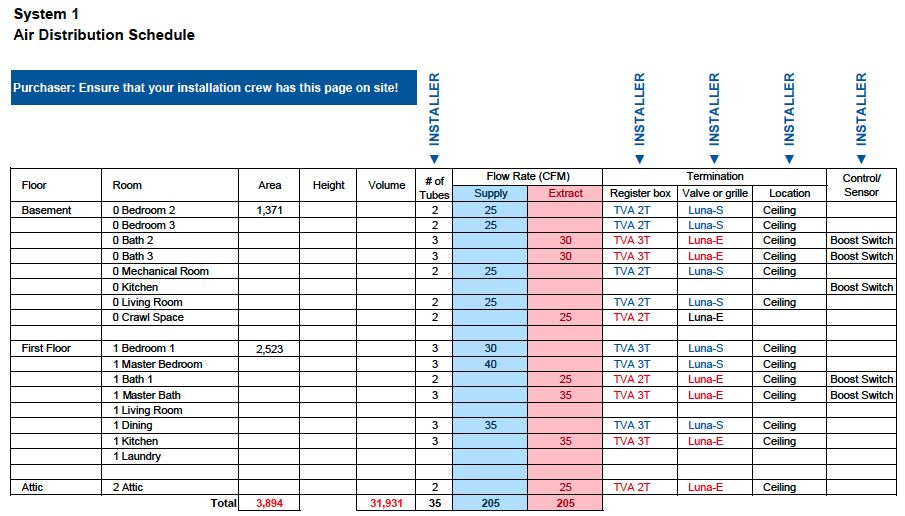
You can see the two branches (Basement and First Floor), the rooms, the number of tubes to each vent, and the airflow rate (in cfm) for each extract (red) and supply vent (blue). On the right side, you can see the size of each register box and type of vent.
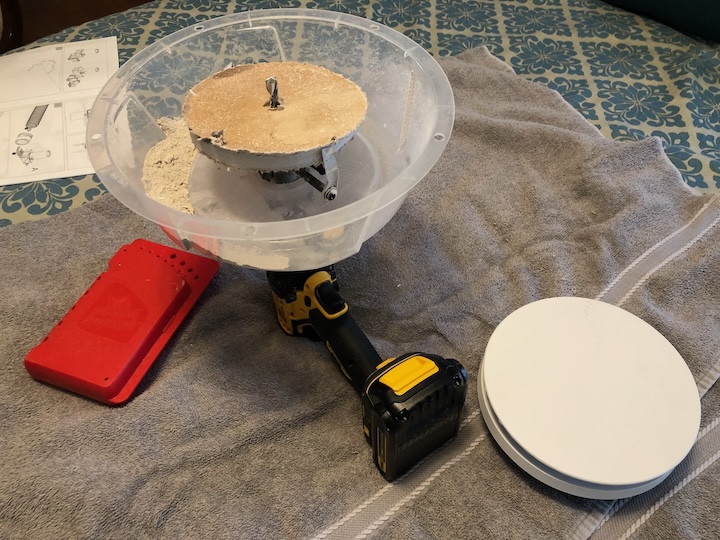
Now, one of the fun parts was setting the register boxes and attaching the vents. We used the hole saw you see above. Tip: To cut the holes in the ceiling, get a hole saw with a plastic dust catcher like the one shown above. It makes cleanup a lot easier. That disk in the middle is the circular piece of drywall cut out of one of the holes.
The photo above shows the ceiling vent connected to the register box duct but hanging well below the ceiling. That’s not how you want it when it’s done. The duct extension has extra length, so you have two options: 1. Attach the register box where it’s convenient and cut off the excess duct, or 2. set the register box at the right height to make the bottom of the duct flush with the ceiling.
You can see in the photo above that we chose the latter. The two pieces of plywood on top of the ceiling joists gave us just enough space to avoid having to cut off excess duct. Tip: Cutting off excess duct is best avoided because it’s extra work and leaves a sharp edge. Also, getting the register boxes a bit higher in the attic makes attaching the ComfoTubes easier.
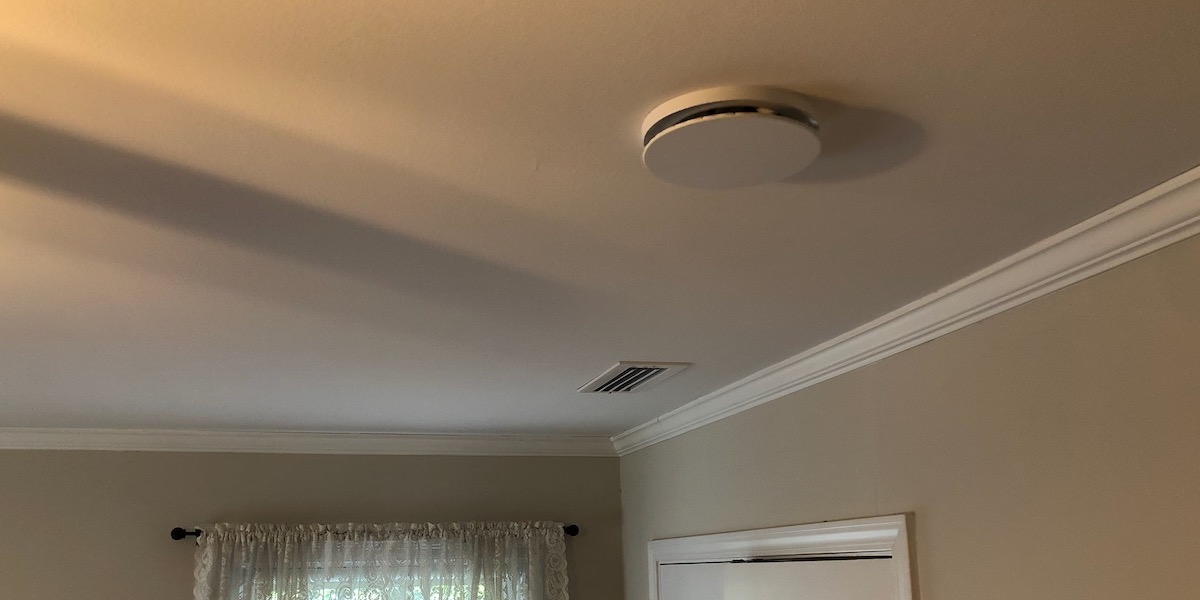
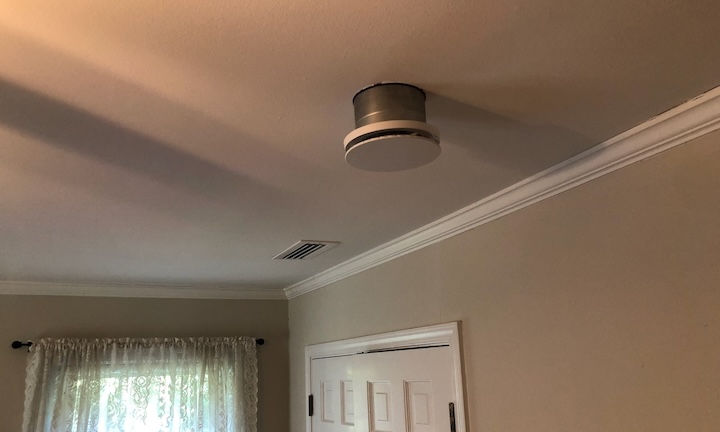
Here’s what the ceiling vent looks like when it’s done.
Connecting the ComfoTubes
Once the manifolds and register boxes are in place in a Zehnder ERV installation, connecting the tubes goes pretty quickly, especially if you have four people helping. If you look at that register box two photos above, you can get an idea of how it works.
The tubes and the black connectors have ridges and grooves. You put a rubber O-ring in a groove on the ComfoTube and then slide the tube into the connector. Once it’s seated, you take that three-sided metal clip and slide it down into a groove in the connector to secure it.
You do that for each tube going to all the register boxes, as John is doing above. And you connect the other end to the manifold, as Aubrey is doing below.
When it’s all connected, the air can move easily between the ERV in the basement and the vents all over the house.
Zehnder calls the ComfoTubes semi-rigid. They’re fairly stiff, but the “semi” part makes them a lot easier to install than rigid duct. As you can see in the photo above, some of the tubes come straight out and go across the top of the joists.
The three coming out and turning left go between the joists and then go back to the other side of the house. Since I have a conditioned attic with no insulation in the attic floor, my joist cavities are available for this.
Also note that each tube going into the manifold is labeled with the room it’s going to.
Finishing up
At the end of the second day of our “Weekend Zehnder ERV Installation Blitz,” as I like to call it, we had all the main floor ducting complete. Then we went back to the basement. The last thing we did was install the controls on the wall above the unit and wire it up. (Actually, John and I watched as Chris and Aubrey wired it up.)
By the end of the weekend, the unit was hanging on the wall, completely connected to all the main floor ceiling vents, and wired up.
It was a gratifying way to spend a weekend and there was much rejoicing, with Negronis. . . .

I’d say the system is about 75 percent complete now. The two main things I need to do before we can fire it up is install the 240-volt outlet nearby and connect the ducts to the outdoors. To be able to use the boost mode in the bathrooms and kitchen, I’ll need to install the boost switches, too. Then, when I’m further along in my basement remodel, I’ll install all the basement vents and it’ll be pretty much complete.
Unique to Zehnder
I love how this system goes together! With most ERVs, you buy the unit and then figure out on your own how to put it all together, using standard ductwork for distribution. You also could hire a company like Energy Vanguard to design the distribution system for you, and we do a lot of them…unless the client is using Zehnder because there’s really not much for us to do then.
With Zehnder, the distribution system is included, and it goes together easily. It’s also independently ducted, which is a benefit. Many ventilation systems get designed on-site by the installer, and they just connect it to the heating and cooling ductwork. That’s usually a compromise, and you may or may not get the right amounts of ventilation happening where you want it. Independent ducting is better.
_______________________________________________________________________
Allison A. Bailes III, PhD is a speaker, writer, building science consultant, and the founder of Energy Vanguard in Decatur, Georgia. He has a doctorate in physics and is the author of a bestselling book on building science. He also writes the Energy Vanguard Blog. For more updates, you can subscribe to Energy Vanguard’s weekly newsletter and follow him on LinkedIn. Photos courtesy of author, except where noted.
Weekly Newsletter
Get building science and energy efficiency advice, plus special offers, in your inbox.


9 Comments
Thank you, Allison. Was this the comfoq air 350, 450, or 600? Just curious which model worked given requirements of your particular site
Huh! I wrote that long article and didn't even say which model I have. Sorry about that. It's the Comfoair Q600.
That's quite an installation crew!
Yes, it was!
Alison,
Yeah - your HVAC guys don''t kook like my HVAC guys.
Is a 240-volt outlet required because it's intended more for Europeans?
charles3: Good question. With the pre-heater, the current draw is 12.7 amps at 240V. At about 3 kW of power, that would put it beyond the standard 120V circuit capacity. I'll ask my Zehnder friends if they have a better explanation.
I had the same thought - I had always heard that one of the benefits of HRV/ERVs is that they added negligible load!
"Many ventilation systems get designed on-site by the installer, and they just connect it to the heating and cooling ductwork. That’s usually a compromise, and you may or may not get the right amounts of ventilation happening where you want it."
For new construction, are there insurmountable impediments to formulating a design that can efficiently use the HVAC ducting to do double-duty as the ERV fresh air supply and return? I'd be highly motivated to avoid two completely independent sets of ducting in my design. How serious would the compromises be?
Log in or create an account to post a comment.
Sign up Log in