
If you’re weatherizing an old home in three days, like I did as a volunteer for MLK Day of Service 2023, you want to look for the low-hanging fruit. That is, find the stuff that will make the biggest difference with the least amount of work and that volunteers can be shown how to do without much difficulty. The house I helped with had one huge piece of low-hanging fruit, which Mike Barcik of Southface Institute points to here:
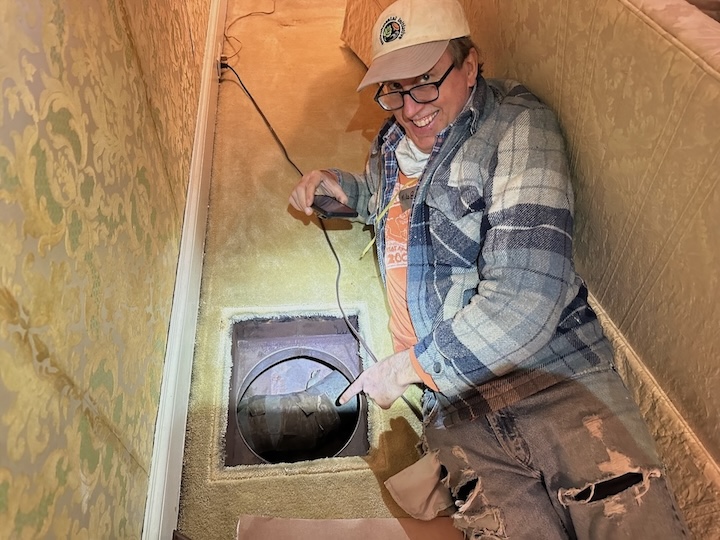
Someone pulled the sofa away from the wall in the living room and exposed a huge hole in the air barrier. It looked like an ordinary return vent in the floor, but when they removed the grille they found there was no duct attached. That 12-in.-diameter hole was wide open to the vented crawlspace below. That meant that drafts, moisture, and critters had easy access to the living space.
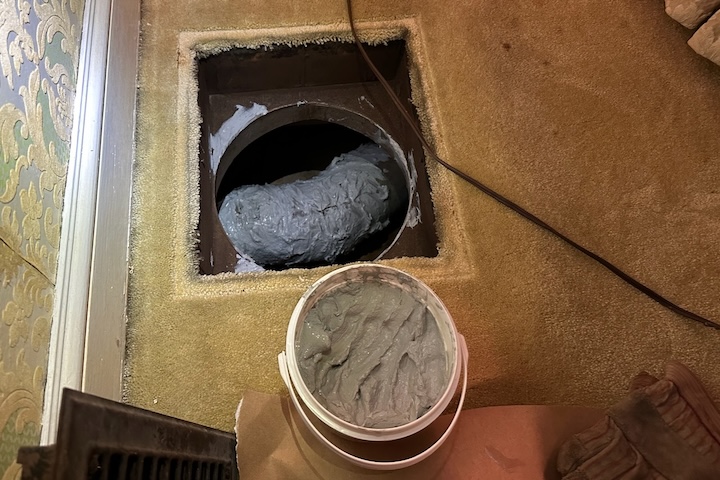
The fix began with encapsulating the tape on the duct below. That kind of tape on old ducts almost certainly contains asbestos, so this is a good way to keep the fibers out of the air. Then they put three layers of foam board into the hole, sealing around them with spray foam. Then the grille went back over the now sealed hole.
Typical attic kneewalls
In weatherization world, any wall that separates unconditioned attic space from conditioned space is called an attic kneewall. They’re notorious sources of comfort and energy efficiency problems. Why? Here are the main reasons:
- They are the site of lots of air leakage.
- Fiberglass batt insulation is often installed poorly here.
- They are often built over open floor joists that allow hot or cold attic air to get under the conditioned space floor.
I’ve written about kneewalls several times in this space and spent quite a bit of time fixing them back in my contracting days.
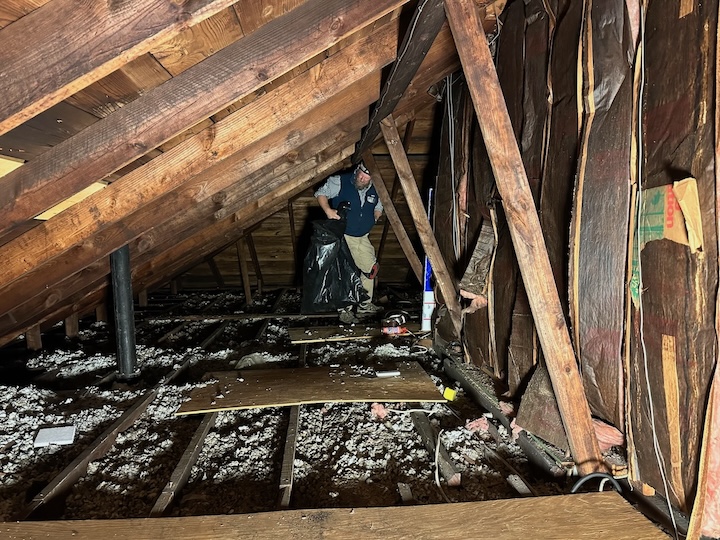
The attic kneewalls in this house had the typical problems. You can tell that room on the other side of the kneewall had problems because there’s a window unit air conditioner in the kneewall. The photo above shows Energy Vanguard’s Jeffrey Sauls getting ready to fix one of the kneewalls before we did anything to it. The lead photo at the top shows Chris Thiele working on that same kneewall.
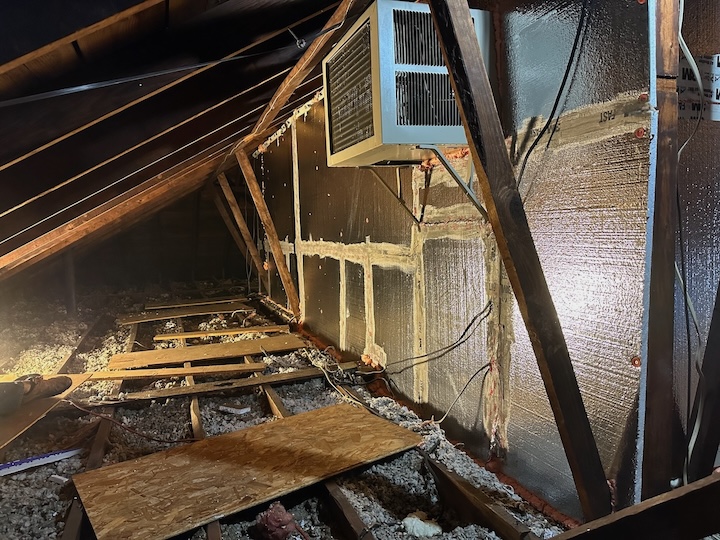
And the photo above shows what that same wall looked like at the end of the long weekend project. The fiberglass batts are now covered with rigid foam insulation, and the seams are sealed with tape and mastic.
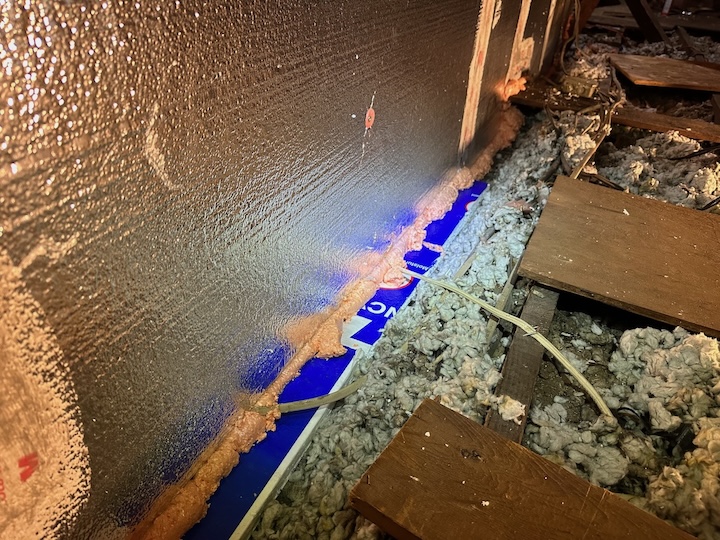
It’s important to fix the whole kneewall, though. The photo above shows the foam board and spray foam sealing everything up at the bottom. The devil, as always, is in the details.
A wiring warning
When weatherizing an old house, it’s important to understand the risks that come with the territory. In this house, the risk that threw up a roadblock was the old knob-and-tube wiring in the attic. This is a 100-year-old house, and that’s what they had in the 1920s.
So what does this mean? The Building Performance Institute (BPI) has standards and certifications for energy auditors and says this in their technical standard for enclosure professionals:
Insulation may not be installed where live knob-and-tube wiring exists.
The problem is that the cloth insulation isn’t durable and can expose live wiring. That could lead to electrical shocks or fires.
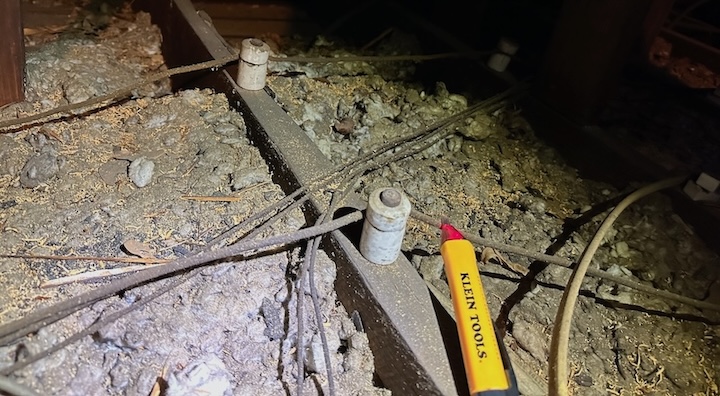
So we tested. The photo above shows the tester lighting up red, indicating that the wire is still energized. So were all the others we found. That meant that we couldn’t add insulation to the attic floor until the knob-and-tube wiring all gets replaced.
Working at the eaves
Even though we couldn’t insulate the attic over the weekend, we did get it ready for insulation. The prep work consisted of doing two things at the eaves. First, the house had balloon framing in the exterior walls, which means the walls were open at the top.
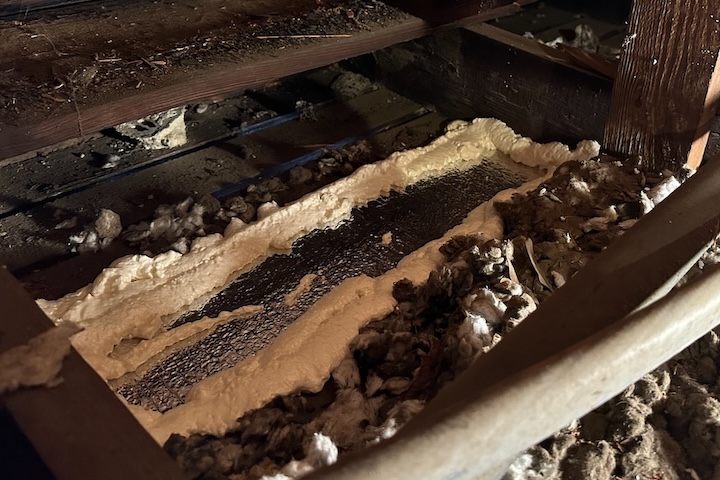
In the photo above, you can see a piece of foam board sealed into place at the top of one of those uncovered wall cavities.
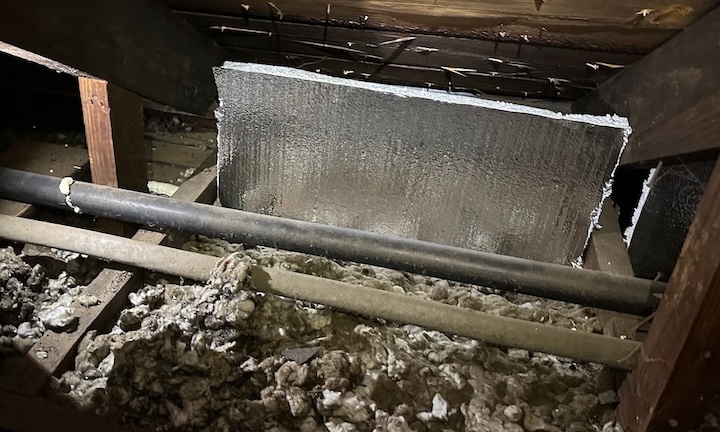
The other prep job was to put insulation dams in place to keep wind from blowing through the insulation and degrading its effectiveness.
Notable improvements
I spent my working time in the attic, but volunteers also did a little work in the basement/crawlspace. They insulated the water pipes. With the weather that immediately followed—a low of 14 °F (-10 °C)—it probably made a difference.
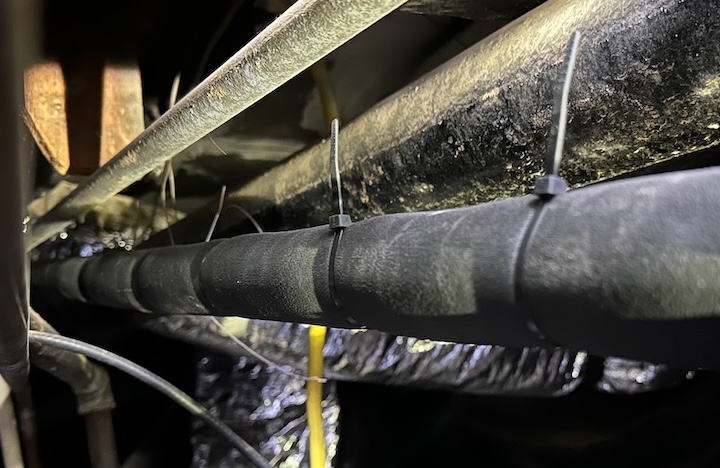
Overall, I think we made a significant difference in weatherizing that old house for the family living in it. The reduced air leakage and improved kneewalls should help with comfort and energy efficiency.
____________________________________________________________________
Allison A. Bailes III, PhD is a speaker, writer, building science consultant, and the founder of Energy Vanguard in Decatur, Georgia. He has a doctorate in physics and is the author of a bestselling book on building science. He also writes the Energy Vanguard Blog. For more updates, you can subscribe to Energy Vanguard’s weekly newsletter and follow him on LinkedIn. Photos courtesy of author.
Weekly Newsletter
Get building science and energy efficiency advice, plus special offers, in your inbox.


One Comment
This kind of practical advice is exactly what homeowners need to make their older houses more comfortable and energy-efficient! Speaking of energy efficiency, I wonder if the ladwp offers any rebates or incentives for these kinds of upgrades? Their programs could really help homeowners tackle these projects.
Log in or create an account to post a comment.
Sign up Log in