Image Credit: All photos: Kent Earle
Editor’s note: Kent Earle and his wife, Darcie, write a blog called Blue Heron EcoHaus, documenting their journey “from urbanites to ruralites” and the construction of a superinsulated house on the Canadian prairies. Their previous blog on GBA was called Adding Walls and Roof. The blog below was originally published in July 2015. (A complete list of Kent Earle’s GBA blogs is provided in the “Related articles” sidebar below.)
I do love concrete. It is one of those rare man-made products that border on being a living thing, like plaster or linen. It has such a rich texture and variation of composition that it seems to beckon you to get up close for a better look and touch it.
Of course, not everyone will share my appreciation of concrete. Traditionalists have tended to cover up the concrete or at least treat it extensively with stains and dyes to make it more palatable. Not us. When I told an interior designer about our exposed basement concrete walls, his response was, “Now that’s modernism with a capital ‘M’!”
“Cool,” I said. “What’s modernism with a little ‘m’?” To which he sheepishly did not have a response. (I’m an ass.)
After the foundation walls had cured for 28 days, we had to seal the concrete. We wanted to get this done before the slab went in, because if we waited to do the floors and walls at the same time, not only would there be framing and drywall in the way, but we would also run the risk of having the drywallers slopping crap all over the walls and making a mess of our beautiful concrete finish.
Like an idiot, I decided not to purchase a $25 wand sprayer to apply the sealant and instead used a nap roller. A job that would have taken me 30 minutes ended up being closer to five hours, rolling every inch of the wall on multiple passes. (Lesson learned.)
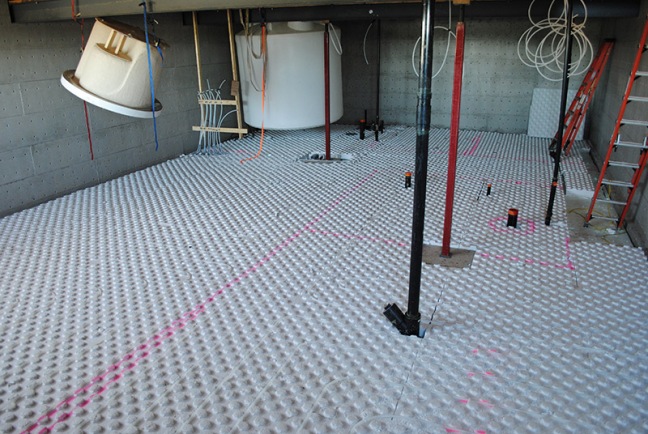
Next, we had to lift the giant water tank and Japanese soaker tub off of the floor and strap them to the steel beams. (Getting the tub in the basement was another adventure in and of itself; I’ll write about it someday.)
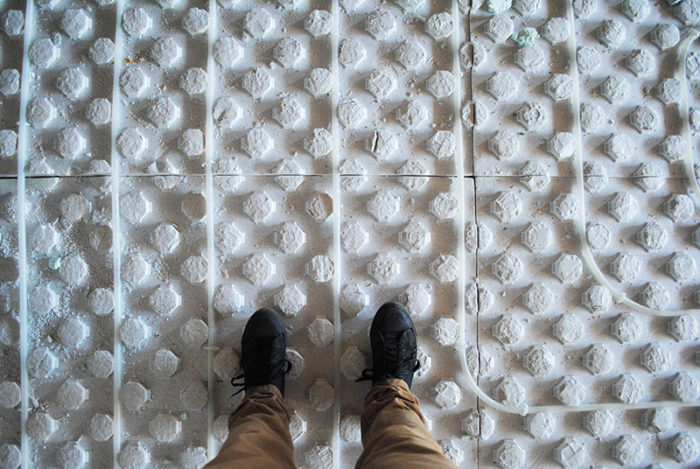
The under-slab insulation was then cut and laid. We elected to use 7 1/2 inches of insulation, which is likely overkill but it does bring the floor insulation to R-30. (Our last house had no insulation in the basement at all.) First, there’s a 5-inch thick layer of Nudura EPS, then a 2 1/2-inch thick layer of Hydrofoam, also made by Nudura. This EPS insulation was pretty cool. Having a honeycomb pattern as the top layer allowed for incredibly easy installation of the PEX piping for in-floor hydronic heating.
Some notes on finding a contractor
We knew that we wanted the concrete floors to be a simple, natural, gray concrete, power-troweled and sealed to complement the exposed concrete walls. No fancy finishing, dying, staining or grinding.
Being that the basement concrete slab was to be our finished floor, it was pretty important to me that it not look like crap. Therefore, the quality of the contractor needed to be top-notch. Unfortunately for us, that was not how we entered into this venture.
I did not meet the contractor before he was actually on site prepping to pour. Darcie had driven home early that day and came upon a most peculiar sight before she reached the house: a rather criminal-looking fellow standing beside a broken-down early 1990s sedan. He was holding booster cables. Our place is a bit out of the way, so this was not a sight one would expect.
Of course she stopped to see what the problem was (as the next passerby would probably not be coming along until much later on). He proceeded to tell her that he needed a boost. He’d gotten in a fight with his boss and left from “that house being built down there,” he said, pointing in the direction of our house. My wife boosted his junk car, and asked if he was going back to work? Nope, he said, and drove off.
My wife drove to the site and found a lone guy working in the basement: no truck, no car, no nothing. She told him she might have just met his worker on the road and asked how he was getting home. He had no idea. Because she was leaving the property, she called our general contractor and asked that he come pick him up. But as she was about to leave, his buddy returned with the car.
When I stopped by later to check on the situation, they were still there. “Working late, boys?” I asked. “Yup,” the boss said, “but we gotta get home, we’re losing light and we don’t have any headlights.” (He wasn’t joking).
It’s “too hot” to pour
He told me that they were planning to have the concrete poured in two days, but they would first need to finish laying the rebar and tying everything in. “I’ll be back at 6 a.m. tomorrow,” he said, before driving off headlight-less into the night. I came by the house at 7:30 a.m. and, not surprisingly, they were not there. Sometime during the day, however, they were back working away in the basement — this time, they’d brought a rusted old Honda. Apparently, this car had headlights and was more reliable.
On Thursday, which was the day of the scheduled pour, they did not show up at all. (What other profession could you simply not show up to work and there be no repercussions?)
The bossman called our general contractor later in the day, apologizing and saying that he had to fire the criminal-looking guy, but promised to complete the pour the next day. I told the contractor that it was tomorrow, or else he was off of the job.
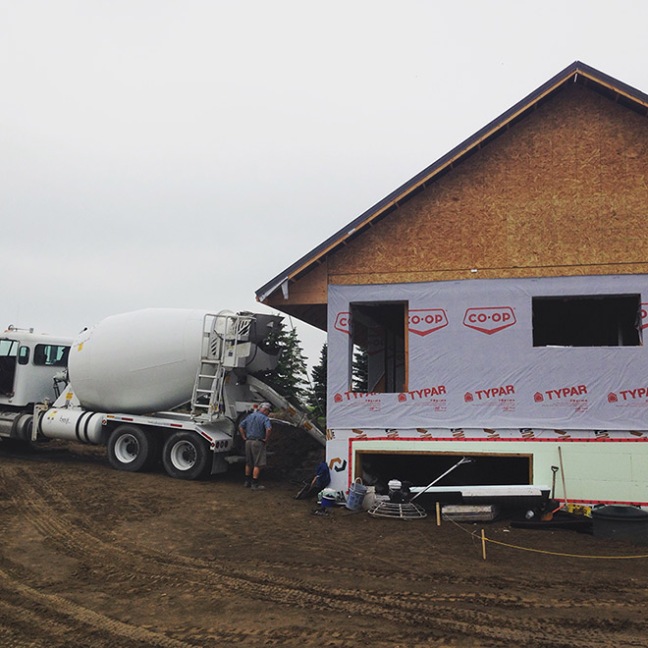
On Friday, I received a phone call from our concrete contractors to say it was “too hot” to pour the basement slab. Granted, it was 34°C (about 93°F). He said that the concrete would cure too fast and they would not be able to guarantee a nice finish. I wondered to myself: Is this a convenient excuse for them in case the floors didn’t turn out? What am I to do? Ask them to pour it anyways?
I called a couple of friends that I have in the concrete business and asked if they were pouring today. They were. I asked if there would be any reason to not pour a basement today and they told me that an insulated basement would be perfect in this weather — being at least 10 degrees cooler in there and not in direct sunlight.
That afternoon, we made calls to find a replacement for our concrete guy. I couldn’t handle it anymore — how many chances do you give someone? That being said, we needed the floor done immediately. This idiot had already set back three other trades with his five-day delay. Especially when Taylor and Curtis worked so hard to be ahead of schedule despite some of the challenges they faced.
Incredibly, we talked to Tyco Concrete Finishing, which was able to squeeze us in early the next week. That Sunday evening we met the owner on site. (I was relieved to see him drive up in new super-duty 4×4 truck). He spent a couple hours with us going through everything, including checking what little work the other guy had done, making sure he knew how we wanted it finished, and confirming all of the dimensions and depths.
Two days later, the floor was poured.
Main floor concrete
We were very happy with how the basement concrete slab turned out. Tyco Concrete had come through for us on short notice and they had done a really nice job. So one week later we had them come back in to do a second pour, this time for the main floor.
We had really debated about how we would like to finish the concrete, but I should digress for a moment and simply state our reasons for a concrete floor in the first place.
First, it’s thermal mass. Thermal mass has the ability to absorb and store energy (heat in particular). For passive solar heating in the winter months, the concrete floor acts like a battery, gaining heat during the day and releasing the heat in the evening. You could use a tile or brick floor to similar effect. Conversely, in the summer and shoulder months (April and October), you really don’t want the sun shining on the thermal mass, as this can lead to overheating. (Thus the importance of passive shading and overhangs).
We still needed a heating system, and a concrete floor would accommodate in-floor tubing for hydronic heat.
Finally, concrete is sexy.
Okay, so now that that is cleared up, we had to decide on how we would like to finish the floors. We had already decided that acid staining and dyeing the concrete was really not our thing — much too fancy-pants for us. That basically left us with two options: power trowel (same as the basement) or grind and polish. We really like both looks.
Grind-and-polish concrete? Not at our place
The grind-and-polish look is something I really like. You need a concrete grinding machine with diamond discs starting with very rough grits of 80 and 120, which grind the top layer of concrete off and expose the pea gravel aggregate. Eventually, you work up to 800-, 1200-, and 2000-grit discs that give a highly polished look to the floor. You get a lot of interesting variation and different colors of the pea gravel coming through (although some people specify all gray or black pea rock if they want something more consistent).
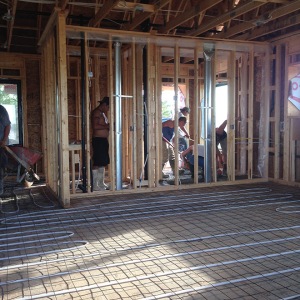
For us, there were a couple of downsides with this approach. First, the concrete topper they were going to pour was only going to be 1 1/2 inches thick, which is pretty darn thin. Although you are only taking about 1/8 inch or so off the top, we had 1/2-inch PEX in-floor piping and metal concrete mesh overtop – grinding off too much could be a horrible thing.
We had seen this first hand. A good friend had built an eco-house in town and wanted a ground and polished concrete floor. Unfortunately the contractor ground off about 1/4 inch too much. It looked great initially, but the layer of concrete over the in-floor heat was so thin that in the next few weeks the concrete started to crack badly following the pattern of the in-floor tubing. It looked so bad.
Needless to say, I was a bit paranoid of that risk.
The second consideration is that you need to grind and polish before drywall as it makes a crazy mess. And you can’t grind and polish until it has cured for one month. That would mean that we would have to put the interior on hold for a month, which we really did not want to do.
The other option was simply to power-trowel the main floor, same as the basement. We have seen this look a lot in more modern homes and I really like the simplicity of it. It is not complicated at all and is, in fact, the simplest, cheapest, and easiest way to go. (Pour and trowel is about $2.50/square foot, while the grinding and polishing cost would be an additional $5 to $6/square foot above and beyond). You pour the floor, power trowel the crap out of it, and call it a day. (In 28 days you can seal it, buff it, wax it — whatever.)
As I said, we liked how the basement floor turned out, particular the very “swirly” areas, as my wife calls them. I hoped that we could make the floors slightly different from the basement floor. I looked into the possibility of adding a bit of black pigment to darken the gray slightly; however, I abandoned this idea after I was told that the pigment dries the concrete faster and can lead to an uneven finish.
Choosing the simplest option
Eventually the decision came down to this question: What is the simplest option? Through this process we have found ourselves periodically down a rabbit hole wondering how we got there and how everything became so complicated. Our answer in those situations, or when we’ve debated about two or three different things, is this: simple is always better. The more complicated, the more things can go wrong.
So I told the concrete guy, “Finish the concrete just like the basement — only more swirly, please.” (He told us that the metal blades of the power trowel are what make the surface swirled and darker; troweling longer and on a higher speed can darken the concrete further).
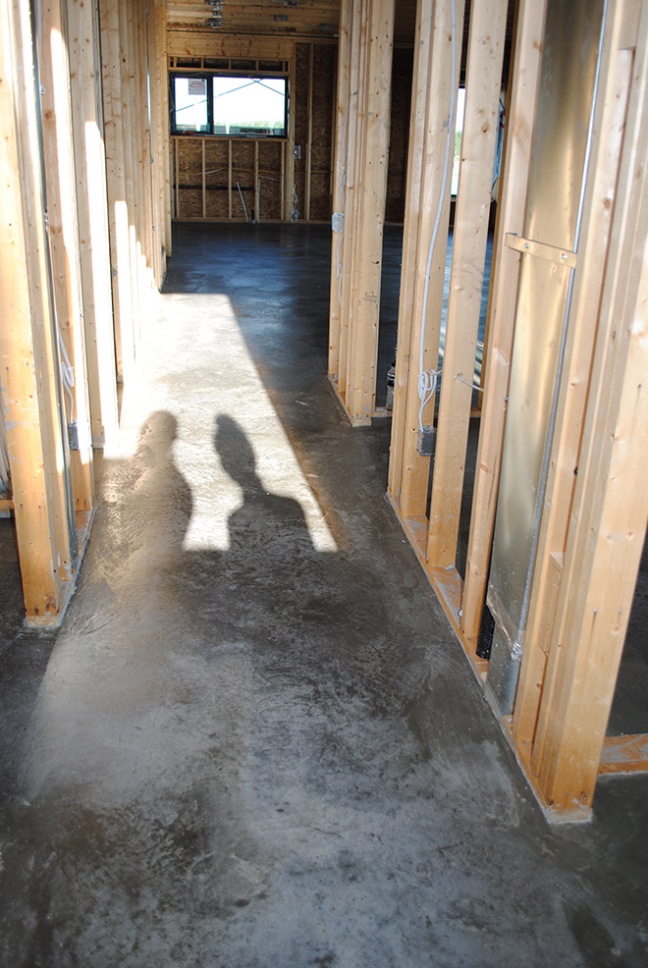
The morning of the pour was crazy again. Our builder did not realize the concrete truck would be there so early, and he’d left a bunch of stuff around the house. I received a text at 6:30 a.m. from the concrete guy: “Someone has to get over here and move all this stuff. Truck is here.”
Fortunately, we were living very close by, so I threw on some clothes and was out the door. We frantically (concrete starts to cure as soon as it leaves the plant – being 30 minutes from the city, every extra moment counts) moved a trailer, two big garbage bins, scrap wood, plywood, and all sorts of junk.
Meanwhile the rest of the concrete crew was even more frantically throwing down the concrete mesh (which provides structural support, like rebar, in thinly poured floors like ours). This stuff was crazy heavy and looked so cumbersome to work with, but these guys were pros. They had the whole floor laid and secured in about 20 minutes.
And so the pour began again. I could not stay and watch, and truthfully, I did not want to see it. Seeing that gray/brown sludge of mud being rolled in and dumped on the floor simply made me nervous. I just wanted to see it looking pretty at the end.
When we got home, all was quiet again. We went to the back door and peaked our heads in.
So swirly!
So very swirly!
Weekly Newsletter
Get building science and energy efficiency advice, plus special offers, in your inbox.


6 Comments
Control joints?
Kent: Did you install any control joints in the floors? I can't see any in the photos. Any cracks show up?
Swirly!! Looks great.
Basement floor insulation
Recently on GBA there was a discussion about a reader having installed too little insulation under a heated slab. Here the writer suggest that maybe he installed too much. Where does the balance lie for insulation under a heated slab?
Response to Antonio Oliver
Antonio,
I attempted to answer your question in my article, Can Foam Insulation Be Too Thick?
Back in 2009, I asked building scientist John Straube to come up with recommendations for rigid foam under slabs. Straube answered, “The cost of insulation becomes more than the cost of generating energy ... in a typical house in a 7,200-HDD climate ... [for] slabs [on grade] at about R-20 to R-25, depending the cost of placing EPS (which costs around 10 cents per R per square foot). Basements have less heat loss [than slabs on grade], so the cut-off point is more like R-15 to R-20 for a basement slab. Heating a slab with radiant tubes increases the temperature of the slab from around 68°F or so to 80°F or so on average, so the insulation levels need to be increased by about 50% over this for radiantly heated slabs.”
Densifier
Hi Kent,
I enjoyed your story.
We self perform all of our concrete on our projects to avoid many of the issues you experienced. Good conscientious concrete contractors are a rare breed, and for some reason chaos always seems to follow even the best of us around.
Now that you have a great finished floor, don't forget to add a densifier. My favorite is colloidal silica, because it's compatible with all sealers and stains. We use Lythic Solutions out here in Portland and I believe it's available nationwide, there are other types of densifiers out there but not sure if others are doing colloidal. It's a small cost per sqft to pay to greatly improve the quality of your floor and reduce dusting and efflorescence. It's very easy to apply, as well. Good luck on the rest of your project.
Control joints
Stephen - that's very observant of you. You're correct, we did not put in any control joints. This was something we debated about extensively too and no one seems to agree on. I toured some houses that had control joints and the cracks still happened wherever they wanted. There was also risk with the main floor (1.5" slab) of cutting too deeply and affecting the in floor heat lines. In the basement the slab would draw inwards and unlikely crack as there were no corners. In the end we decided to just let the concrete do what it would do and not put in any control joints. Cracks have shown up in the corners but I kind of like it. It does not bother me.
Concrete cracks - c'est la vie.
hi kent
thanks for the story.
hi kent
thanks for the story. jumping in on an old thread so no worries if no time to respond...
now that you're 2 years out, how are the floors?
we're getting ready to pour and my builder is a bit concerned about using the slab as the finished floor. anxiety about cracking, not loving how we may perceive the control joints (im fine with them, but didnt know you could opt out of 'em-interesting-our footprint is 25'x50' ish, so they "could" hide them), and how hard & cold the floor will be. our build is in in white mountains, nh. we're doing r20 under slab so it seems we'd be ok as far proper insulation, and are willing to live with a hairline cracking that may show up down the road.
nothing quite like feedback from homeowners who've lived with their build for few years now.
Log in or create an account to post a comment.
Sign up Log in